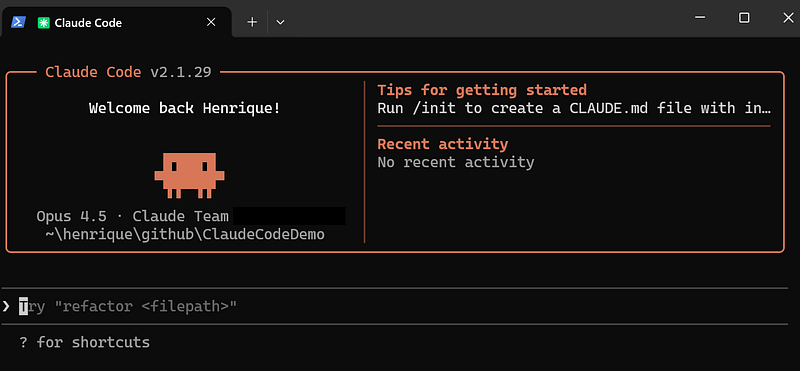
Claude Code is an agentic coding assistant developed by Anthropic that runs directly in your terminal and excels at complex reasoning and coding. It can navigate large codebases, implement features from natural language instructions, investigate and fix issues, and automate repetitive tasks. In this article, I explain how to use Claude Code to automate and streamline your development workflow.
Installing Claude Code
Claude Code can be used via a web interface, but the true power is fully unlocked when using the Claude CLI (Command Line Interface). For that, install Claude locally.
Installation instructions are available at: https://code.claude.com/docs/en/quickstart.
To access Claude Code, navigate to your project directory and type /claude:
You can use Claude Code via terminal, or you can also add an extension for it in Visual Studio Code, for that, search by Claude Code extension from Anthropic, and after installing it you can opt to use a chat window for Claude Code inside VS Code:
Claude Code Models
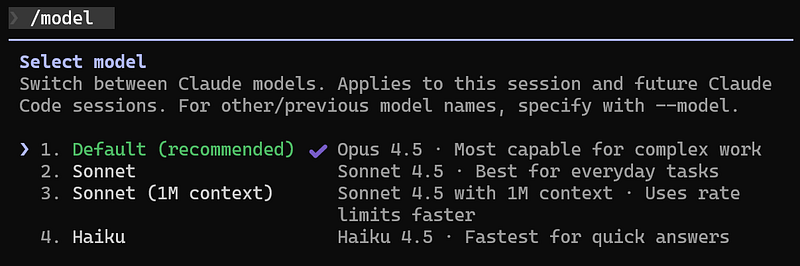
Within the Claude family, there are three models, each designed for different levels of performance and complexity. You can choose which model to use depending on the task you are working on. Since each model has different speed, cost, and reasoning capabilities, selecting the right one can significantly impact both performance and productivity. The available models are:
- Haiku: The fastest and most lightweight model, ideal for quick tasks, simple queries, and high-throughput operations.
- Sonnet: A balanced option that combines strong reasoning capabilities with good speed, making it suitable for most day-to-day development work.
- Opus: The most powerful model, built for deep reasoning, complex analysis, and demanding tasks that require maximum accuracy and context handling.
You can select a model when starting Claude or switch models at any time during your workflow. For that, type /model in Claude Code and select the model you want to use:
Note that this will apply only for the current session. If you want to change the model for the future sessions as well, you need to set the default model in the settings.json file or ask Claude Code to add it for you (I will explain more about this file in another topic in this article).
Claude Code Bash Terminal
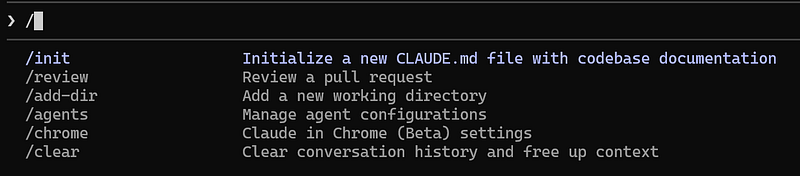
In the Claude Code Terminal is where you can write prompts and ask things to Claude Code. To see the available commands, type / and a list of commands will be shown:
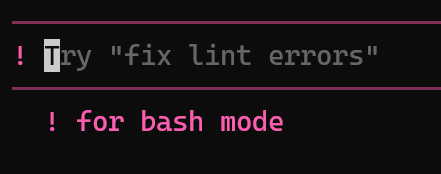
You can also press ! to enable the option to run Bash commands in the terminal:
The init command
The /init command is the first command you run when using Claude for the first time in a new repository. It scans the directory to detect your tech stack, summarises the project structure, and creates the CLAUDE.md file. This helps Claude understand your project from the beginning.
For that, access your repository directory via the command line and run the /init command, and it will ask if you want to create the CLAUDE.md file, select Yes:

After that, the CLAUDE.md file with the details and specifications of your project can be found in the root of your repository directory.
The CLAUDE.md file
The CLAUDE.md file is a project instruction file that teaches Claude how your repository works. Think of it as a README for the AI: it provides context, constraints, and guidance so Claude can make better decisions when working with your code.
The CLAUDE.md file lives at the root of the repository and is automatically loaded in every session. This file contains structure guidance so Claude understands how to build and run the project, the architecture and folder structure, coding conventions and patterns, testing strategy and important commands and workflows. Instead of guessing how your repository works, Claude reads this file at the start of every session and uses it as ground truth when generating or modifying code.
For demonstration purposes, I created a new .NET Web API project and below is the initial CLAUDE.md file that was generated for the project:
# CLAUDE.md

This file provides guidance to Claude Code (claude.ai/code) when working with code in this repository.

## Build and Run Commands

```bash
# Restore dependencies
dotnet restore

# Build the solution
dotnet build

# Run the API (from solution root)
dotnet run --project src/ClaudeCodeDemo.API

# Run with specific profile
dotnet run --project src/ClaudeCodeDemo.API --launch-profile https
The API runs on:
- HTTP: http://localhost:5224
- HTTPS: https://localhost:7199
OpenAPI documentation is available at /openapi/v1.json in development mode.
Project Structure
This is a .NET 10 ASP.NET Core Web API solution using the SLNX format (XML-based solution file).
ClaudeCodeDemo.slnx- Solution filesrc/ClaudeCodeDemo.API/- Main API project- Controllers use attribute routing with
[Route("[controller]")] - OpenAPI enabled via
Microsoft.AspNetCore.OpenApi
- Controllers use attribute routing with
It’s important to keep this file updated, as your project evolves, to ensure it reflects the latest structure, tools, and conventions. In new projects, you may need to manually add initial guidance in this file, since there may not yet be enough code for Claude to learn from.
Using this project as an example, I now added a Domain and an Infrastructure layer to the project, and after that, I re-created the CLAUDE.md file, to be updated with the latest project changes, and had to restart Claude Code.
In terms os scope level, you can have a .CLAUDE.md file at the project level, and you can also define a global version that applies to all projects in your environment. To configure it globally, create a .CLAUDE.md in the root of the .claude folder in your user directory (for example, C:\Users\<your-user>\.claude). This file will automatically be loaded in every session in your environment, and used as a shared context across all your projects.
Custom Instructions to CLAUDE.md file
You can customise how Claude behaves by adding personalised instructions to the CLAUDE.md file. For that, you can use the symbol # and inform the command next. For example:
# Do not add comments in the code, except when the code is quite complex.This instruction will be merged into your CLAUDE.md file automatically, and next time you ask something to Claude, the new instruction will already be considered:

...

## Code Style

- Do not add comments in code, except when the logic is complex
Referencing a file as Context
To reference a specific file in Claude, use the @ symbol followed by the file path or file name. When you do this, Claude automatically includes the file’s content in your request and uses it as context for processing. For example:

Claude Code will then read the specified file and provide explanations based on its contents. This also works for images. You can add an image file and reference it in the prompt, or even open the image in VS Code and copy it and paste it to the prompt. This can be very useful when you want to create something based on an image, so you ask Claude Code to use the image as a design reference for example.
You can also combine the # and @ symbols into a single command, to update your CLAUDE.md file with specific instructions or guidelines, for example:
# when requested to implement a new controller, follow the structure and
pattern that are used in the @WeatherForecastController@tells Claude to read this specific file#updates theCLAUDE.mdfile to include this guidance, so Claude Code remembers it for future sessions
This can be used to enforce consistent coding patterns, test structures, and architecture rules across your repository.
The Settings File
The settings.json is a file that contains the configuration for how Claude behaves (it is used as the technical “backbone” of Claude). In this file, you can set the default model that should be used (e.g. Sonnet, Opus or Haiku), set permissions, tool access (e.g. which tools it can run without asking), hooks, execution preferences, safety controls, model definition, environment variables, etc.
You can have a settings file for different scopes:
- global scope: this file is located at the root of the
.claudefolder, in your user directory (e.g.C:\Users\<your-user>\.claude). The settings on this global scope file is applied to all Claude projects. - project scope: a settings file for a specific repository. This file can be shared with the team and can be committed to source control, allowing the team to share the same configuration, defaults, and behaviour for that specific project.
- user scope: a personalised settings file, only for your own user.
In the example below, there is a setting file with the model Sonnet 4.5 defined:
{
  "model": "claude-sonnet-4-5-20250929",
  "permissions": {
	"allow": [],
	"deny": []
  },
  "env":{}
}
Context Window
When using Claude Code, the conversation context can grow quickly. As more messages, files, and instructions are added, the model must process a larger amount of information. This increases the token usage (and costs), slows down responses and can cause confusion to the model, leading to less accurate results.
For this reason, it’s important to keep the context lean and reset it when necessary. Claude provides several commands to help you manage the session efficiently:
/compact: summarises the current conversation into a smaller context (to save space in the context window) while preserving key information, reducing token usage without losing important details. Note that when summarising, the model will have the big context of the conversation, but might lose some small details. When running this command, you can also specify some custom summarisation instructions by doing/compact <add your summarisation instructions>. This command is automatically run by Claude Code when the context window reaches 95% of the capacity, to free up some space./clear: completely clears the conversation history and resets the context, giving a fresh start. This is useful when you are switching to a different unrelated task, or the current conversation context might confuse Claude for the new task, or if you just want to start over without any previous context./exit: ends the current session and exits the chat. You can start a fresh one by runningclaudeagain.
Using these commands regularly helps keep Claude faster, cheaper, and more accurate during long or complex workflows.
You can use the instruction /context to see the context usage per category and the free space in the session:
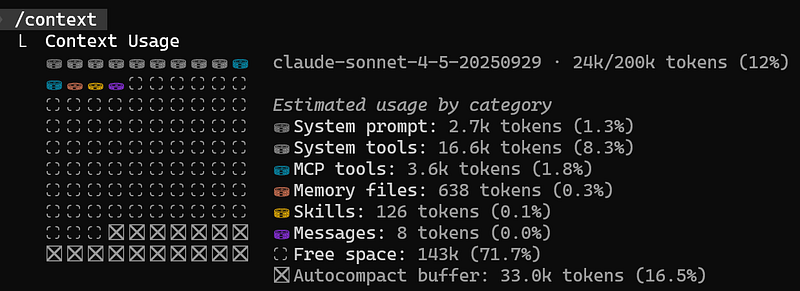
To keep the context window clean, try to keep the sessions focused on one particular feature, to not pollute the context window with information that is not relevant to that feature. During the session, get used to using the /compact command to clear up space when you finish a small part of the feature.
Checkpointing
When working on long or complex tasks, it is easy for the conversation to drift or for Claude to make incorrect assumptions. Checkpointing solves this problem by allowing you to roll back to an earlier state in the session.
For that, you can use the /rewind command (or press ESC twice), which allows you to rewind the session to a previous state; it “jumps back” to a previous “save point” without losing all your progress. This way, instead of restarting the entire conversation or manually cleaning context, you simply return to a moment before things went wrong.
Plan Usage
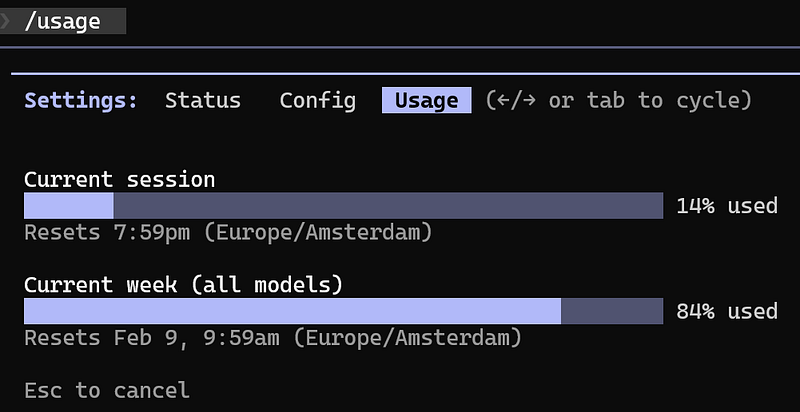
Working with an agentic tool like Claude Code requires an eye on the resource consumption. To check your Claude Code Plan usage limits and session status, type /usage. This command shows how much of your quota has been consumed, how much remains, and details about your active session, helping you monitor costs and avoid interruptions during longer workflows:
To check your Claude Code Plan usage limits and session status, type /usage. This command shows how much of your quota has been consumed, how much remains, and details about your active session, helping you monitor costs and prevent tasks interruptions due to quota exhaustion:
Planning Mode
Claude offers a Planning Mode for complex tasks. When enabled, Claude explores your project in depth before making changes.
When using this mode, it reads more files in your project, creates a detailed implementation plan for the requested task, shows you exactly what it intends to do, and waits for your explicit approval before touching any code.
This gives you a chance to review the plan, suggest adjustments, and ensure that all edge cases or scenarios are considered before code is modified.
Thinking Modes
Thinking Modes allow Claude to spend more time reasoning through “Chain of Thought” before producing an answer. This is useful when you need deeper insights into complex or challenging issues.
As you move up the scale, Claude is allocated more tokens and processing time to handle higher levels of complexity. To activate thinking mode, press Alt+T (Windows) or Option+T (macOS) and select if you want to enable or disable it:
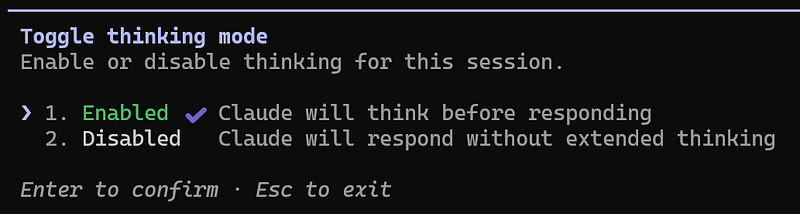
Extended thinking is enabled by default, reserving a portion of the output token budget (up to 31,999 tokens) for Claude to reason through complex problems step-by-step. (Claude code Docs)
Alternatively, you can also check this configuration in /config:

The available Thinking Modes scale according to the level of reasoning required. “Think” handles simple tasks with basic reasoning, while “Think more” and “Think a lot” provide deeper analysis for moderately complex or challenging problems. For the most demanding scenarios, “Think longer” and “Ultrathink” allocate additional time and compute power, enabling thorough, in-depth, multi-step reasoning.
Higher modes give Claude more tokens and processing time, allowing it to provide more accurate and detailed solutions.
Planning Mode vs Thinking Mode
While Planning Mode and Thinking Mode might seem similar, they are designed to handle different types of complexity in your project.
- Planning Mode focuses on Breadth. It is best suited for tasks that require a broad understanding of your codebase, such as multi-step implementations, changes that impact multiple files or components, and tasks that require an overall strategy before coding. Planning Mode creates a detailed implementation plan and waits for your approval before making changes, giving you control over the process.
- Thinking Mode focuses on Depth. It is ideal for tasks that require deep reasoning, such as solving complex logic problems, debugging difficult issues and algorithmic or computational challenges. Thinking Mode allows Claude to analyse problems thoroughly, often showing its internal chain of thought before presenting a solution.
Both modes can be combined for tasks that require both strategic planning and deep analysis, but keep in mind that they may consume more tokens and take longer to process, so there’s a cost consideration for using them.
Tools
Tools are functions that allow Claude Code to do things in our application. An AI model can only reason, plan and generate text. To perform actions like reading a file, writing a file, executing a command, etc., it uses a specific tool to perform that action.
When you write a prompt asking AI to write a unit test, for example, the AI model will use a tool to execute write operations. This is automatically handled by the AI model, it happens behind the scenes, but certain operations (like writing files or executing commands) may require explicit permission from the user (Claude Code generally ask for it before doing something). You can find the full list of available tools in the Claude Code Docs.
When you request something that requires the usage of a tool, Claude Code will ask for your permission to perform specific actions (like writing, etc). You can give the permission (or not), when requested, and you can also choose an option to not ask for that permission again.
To manage permissions, you can specify the permissions in the settings file, or you can use the /permissions command, and you can add, deny or set to always ask for confirmation before using the tool:
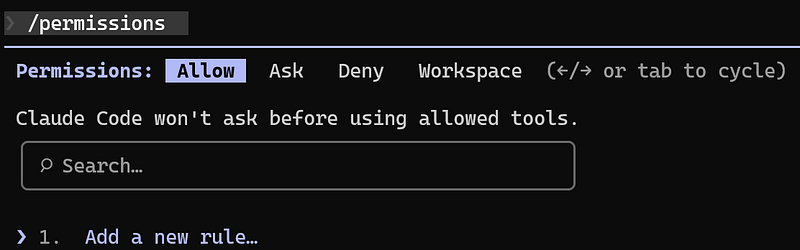
You can give permission for a tool to do everything, or only allow the tool execute specific actions, for example, to only change branches but not create a new repository. The permissions can be added in a global, project, or user scope (will be added to the related settings file).
Skills
Skills are predefined instructions that teach Claude Code how to do specialised tasks in a particular way that you prefer. With Skills we can define patterns and predictable outcomes by guiding Claude on how to do certain things in a specific way. For example, we can define how data models are created, how database queries are structured, how to create branch names, etc.
With Skills, when you request something to Claude, for example, to create a new branch, Claude Code can identify that there is a Skill for it, and it will load it to follow the instructions that were pre-defined in the file. They are only added to the context window when Claude Code needs to access them.
To create a Skill, create the skills directory inside of .claude folder, and create a folder with the Skill name, and inside of it, create a SKILL.md file with the specification that tells Claude when to use the skill and the instructions it needs to follow when the skill is invoked.
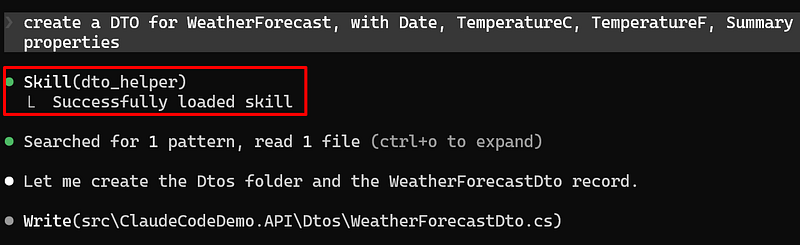
The file’s content starts with a metadata section wrapped between three dashes (---). This section includes the name and the description field, which helps Claude decide when to load it automatically. The metadata is automatically loaded to the Claude Code context, so it can use it to decide when this skill should be executed. Below the metadata, you provide the instructions or behavioral rules Claude should follow when the skill is invoked. For demonstration purposes, I created a Skill with some instructions regarding how a DTO should be created:
---
name: dto_helper
description: Create DTO/Data Transfer Object.
---
# DTO & Mapping Rules
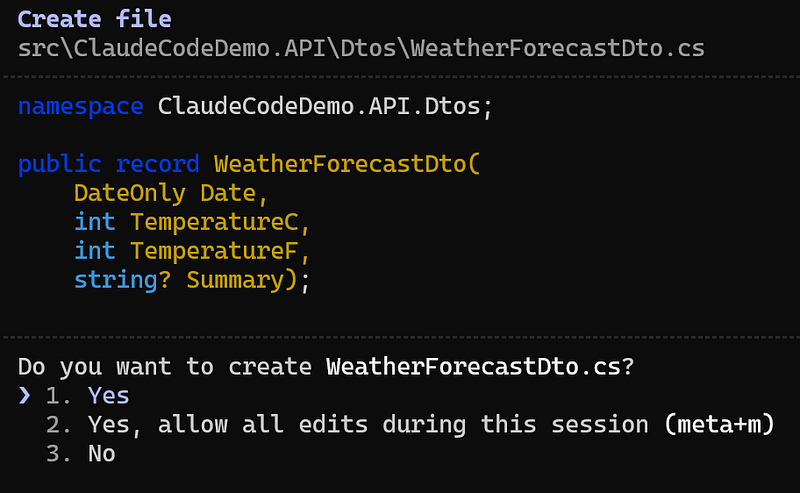
- **Location**: Place all DTOs in the `src/ClaudeCodeDemo.API/Dtos` folder.
- **Immutability**: Use `public record` for DTOs, not classes.To start using the newly added Skill, restart claude ( /exit and /claude). Now, when we request something like “create a DTO for WeatherForecast, with Date, TemperatureC, TemperatureF, Summary properties”, Claude Code will automatically load the skill:
And it will ask to create the file following the specifications defined in the Skill:
You can configure whether the Skill can be invoked by the user or by Claude Code. For that, you can specify in the Skill.md file the following:
- default: if you do not specify anything, both you or Claude code will be able to invoke the skill
disable-model-invocation: true: only the user can invoke the skilluser-invocable: false: only Claude can invoke the skill
If you do not provide any configuration or disable model invocation, you will be able to trigger the Skill by typing its name:

Using Arguments
When working with Skills and Slash Commands (will explain about it in the next topic), it’s also possible to define arguments that will be used by the Skill, by using $ARGUMENTS. This way, you can specify a value that will be included in the Skill context, to guarantee that the action will be executed as you specified. without leaving room for Claude Code do something different from what you specified.
As demonstrated in the previous example, Claude Code was able to reason and create the DTO following the project convention, but you can be even more specific and make use of $ARGUMENTS to ensure exact and unambiguous input. For example, this is the write_unit_tests skill which I created for demonstration purposes:
---description: Implement unit tests
argument-hint: Inform the class name
---
## Task
Implement unit tests for: $ARGUMENTS
Testing stack and conventions:
- Framework: xUnit
- Use [Theory] with [InlineData] whenever multiple inputs or scenarios
validate the same behavior.
- Follow the AAA pattern (Arrange, Act, Assert) with clear section comments
- Use NSubstitute to mock dependencies
- Use FluentAssertions for all assertions
- Use meaningful test names: MethodName_Should_ExpectedBehavior_When_State
Test coverage requirements:
- Test happy paths
- Test edge cases
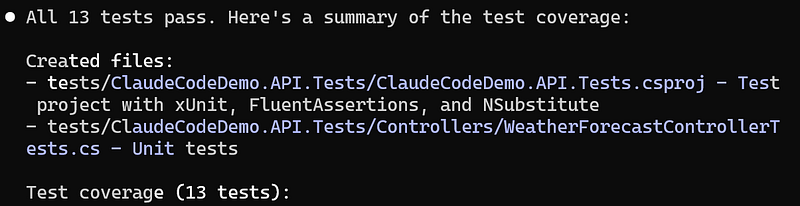
- Test error statesTo run the Skill, restart Claude Code and type the Skill name, and the hint will be shown on the side in grey. Specify the class name, and your unit test will be created:

Multiple Arguments
It’s possible to specify one or multiple arguments. For demonstration purposes, I created a Skill that generates an entity, and accepts as arguments the EntityName and the Properties of the entity:
---
name: generate-entity
description: Generate EF Core entities with properties and DbSet
registration.
argument-hint: Specify the EntityName and its properties
---

# EF Core Entity & DbSet Rules

- **Location**: Place all entity classes in the
`src/ClaudeCodeDemo.Domain/Models` folder.
- **Class Type**: Use `public class` for entities.
- **Properties**: Define type and name (e.g., `Id:int`, `Name:string`).
- **DbContext Registration**: Automatically add a `DbSet<EntityName>`
property to the `ClaudeCodeDemoDbContext` class.
- **Namespace**: Ensure proper namespace for entity and context.

---

## Task

Create an EF Core entity class with the following specifications:

- Entity name: `$ARGUMENTS.EntityName`
- Properties: `$ARGUMENTS.Properties`
- Add the entity class to the `Entities` folder
- Register the entity in the `ClaudeCodeDemoDbContext` as
`DbSet<$ARGUMENTS.EntityName>`

### Example:

If `$ARGUMENTS` is:

```json
{
  "EntityName": "Product",
  "Properties": ["Id:int", "Name:string", "Price:decimal"]
}
Now let’s use this Skill by typing:
/generate_entity City, Id:int, Name:string, CountryId:int, Latitude:double,
Longitude:double
And Claude Code will take care of creating the entity and updating the DbSet for us (or it can also create the DbSet file in case the file does not exist yet):
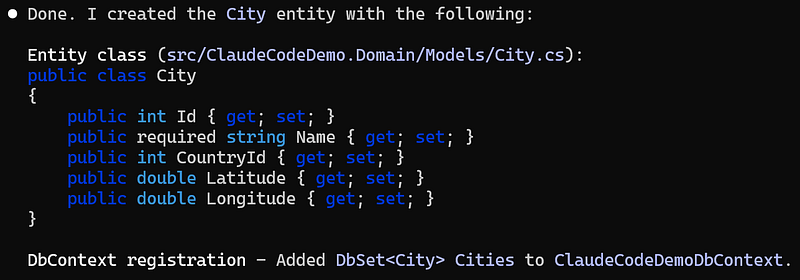
This is a great way to automate tasks and be sure that the output will be consistent, as the context and specification are being provided to Claude.
Slash Commands
Slash Commands/Custom Commands, were recently merged into Skills, as stated in Claude Code Docs:
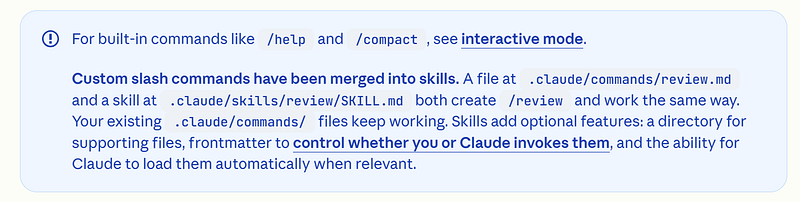
I’m still going to cover it in this article, as they can still be used for different purposes, but keep in mind that they work in a very similar way. The main difference between Slash Command and Skills is that with Slash Command, the user needs to manually request the command to be executed, while Skill can be executed automatically, or similar to Slash Command, manually executed.
Claude allows you to create your own commands to automate repetitive tasks. To create a personalised command, go to .claude folder (manually create the folder in case you do not have it yet), and create a new directory named commands, and inside of it, create your command file. In the command file, you can add a prompt to execute some specific action.
Similar to Skills, the command files are also markdown files, on which you add instructions that should be followed, and the file starts with metadata at the top, between three dashes (---), and contains a name and description, and below, detailed instructions.
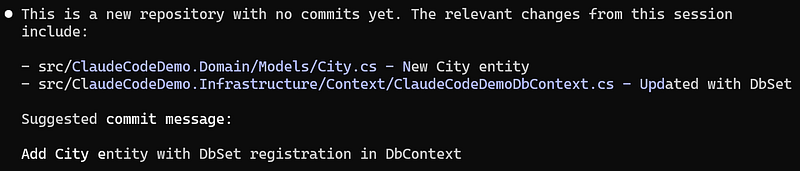
For demonstration purposes, I created a command that will check the changes that were commited in the branch and compare with the master branch and generate a commit message based on those changes (we could go beyond and also make it commit to the repository, but for simplicity, let’s just ask to generate the message):
---
description: Create a commit message
---

## Your task:
Analyse the git changes and create a commit message based on the changes.
Use short sentense in the present tense. Start the commit message with
capital case.

## Run these commands:
```bash
git diff --stat origin/master...HEAD
The name of the command is the name of the file. Once you create the command, restart Claude (by running exit and then claude in the command line tool). To execute the newly created command, execute:/<command-name>:

Here is the output after running it in a demonstration project:
Similar to Skills, Slash Commands also support $ARGUMENTS for string substitutions for dynamic values.
MCP Servers
MCP stands for “Model Context Protocol”, it was designed by Anthropic and it defines a way that AI can interact with external sources. This can be achieved by providing them with additional tools and contexts through MCP Servers. An MCP Server is a system that follows the protocol, and it task is to expose tools and resources to an AI model for a specific external service or data source.
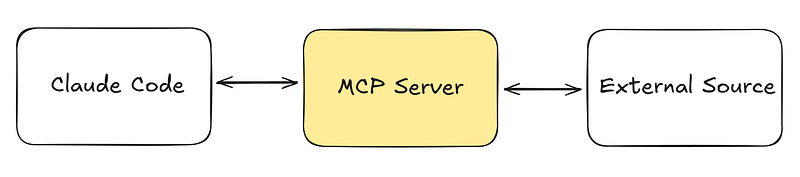
With MCP Server we can extend Claude's capabilities, providing new tools and possibilities to the AI assistance. An MCP Server acts like a bridge that connects AI models (like Claude) to external data sources and tools.
You can use an MCP server to interact with the outside world, for example, interacting with the browser, automating Git, integrating with Productivity Tools, etc. On Claude Code Docs, you can also find a list of Popular MCP servers.
An MCP Server can be configured in three different ways: via a remote HTTP Server, via an SSE Server or via a Local server. More information about how to configure an MCP Server can be found in this official Claude Docs.
The MCP can be installed using different scopes:
global: the MCP will be added globally to Claude Code and it can be used for any project in your environment.project: the MCP setup can be commited and everyone using the project can use the MCP Server.local: only you can use the MCP Server in this particular project.
For demonstration purposes, let’s add the Playwright, which is an MCP Server that provides browser automation capabilities. Let’s add it using a local studio Server approach:
claude mcp add playwright --scope project npx @playwright/mcp@latestAnd a new .mcp.json file will be created in the root of the repository:
{
  "mcpServers": {
	"playwright": {
	  "type": "stdio",
	  "command": "npx",
	  "args": [
		"@playwright/mcp@latest"
	  ],
	  "env": {}
	}
  }
}
Every time you use an MCP server tool, Claude will request permission to execute the tool. To avoid this, you can include a permanent permission to execute the MCP Server, for that, go to the .claude directory, and inside of the settings.local.json add a field for enabledMcpjsonServers and add the MCP Server that we just added:
{
  "permissions": {
	"allow": []
  },
  "enabledMcpjsonServers": [
	"playwright"
  ]
}
With this config, Claude will always use the tool without having to ask permission every time it is executed. After that, restart Claude, and you will be ready to use the MCP Server.
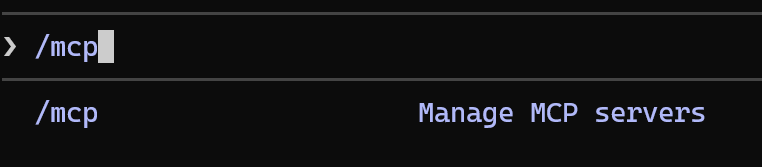
In Claude Code, type /mcp and you will see the MCP servers:

Now on Claude Code we can ask to interact with the browser (and when requested, give access to execute the actions in the browser):
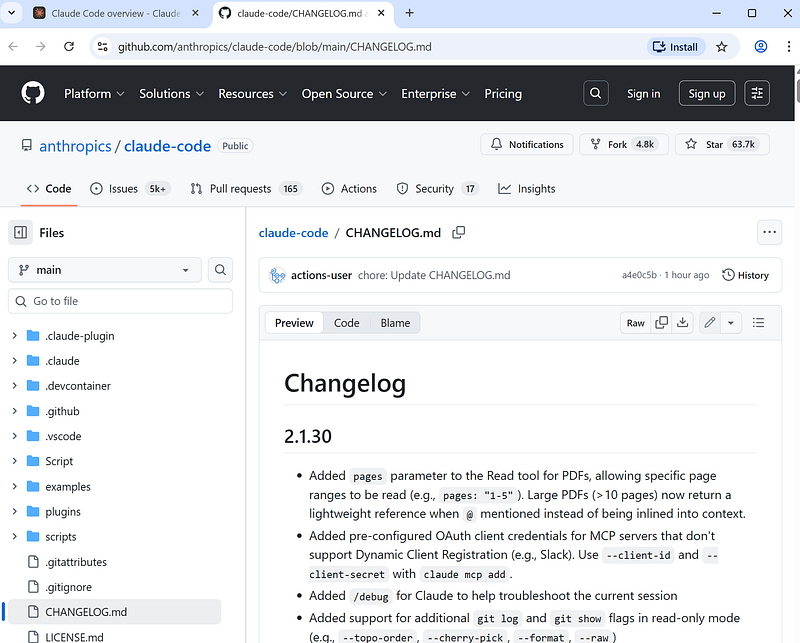
Open claude code docs website and click on changelogAnd the website will be opened:
And it will click in the Changelog, which will open the GitHub page:
claude mcp remove playwrightHooks
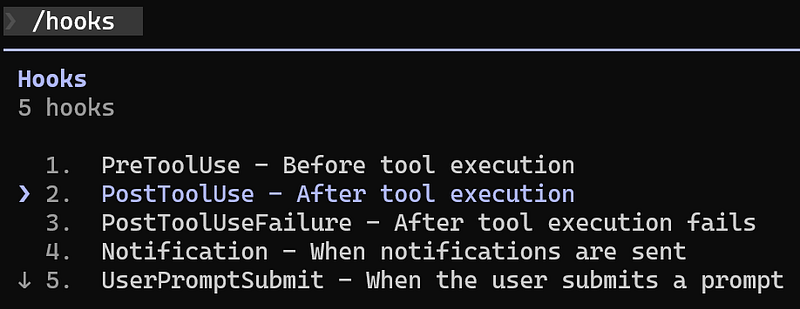
Hooks are user-defined commands/prompts that automatically run at specific points in Claude Code’s lifecycle. For example, we can define a hook to be triggered before or after the code is executed, or when a session starts, etc. To see the full list of Hook Events, check this Claude Code Docs page.
Hooks are useful for implementing automated workflows, for example, instead of manually asking Claude to run checks or commands, hooks let you automate those steps so they happen automatically in the background (unlike custom commands, which you must invoke yourself). You can use hooks to format files, run tests, validate changes, review the code, block access to specific files, etc.
To create a hook, type /hooks, and select the hook type you want to create:
For demonstration purposes, let’s add a hook that formats the code. For that, I selected PostToolUse and will add a new matcher:
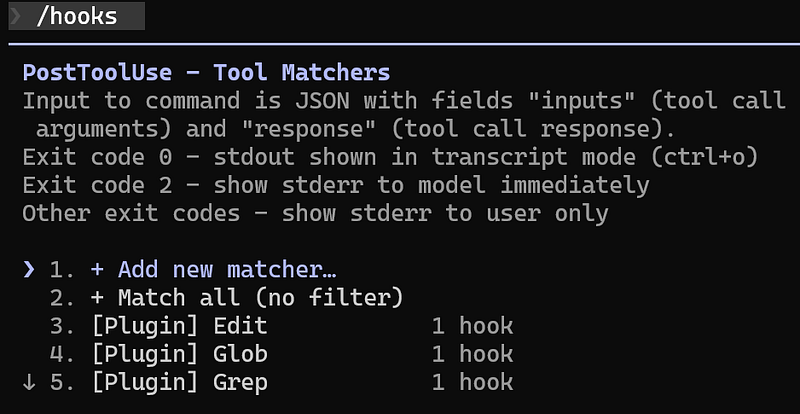
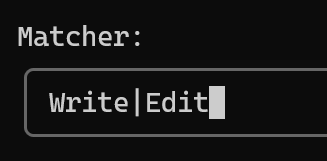
For the Matcher, let’s add Write|Edit and confirm:
Next, we need to write the command that will be executed, for this example I add the command to format the code:

Now checking the settings file, the hook will be there:
"hooks": {
  "PostToolUse": [
	{
	  "matcher": "Write|Edit",
	  "hooks": [
		{
		  "type": "command",
		  "command": "dotnet format"
		}
	  ]
	}
  ]
}
With this hook, every time Claude Code makes a change in the code, it will automatically run the dotnet format command (when asking something to Claude Code, you can press Ctrl + o to enable the detailed transcript with more details about what was executed).
Plugins
A Plugin is kind of a “package” that can contain a combination of different Custom Slash Commands, Skills, Hooks, MCP Servers and Sub-Agents and can be distributed.
To install a plugin, you need a plugin marketplace, which is a JSON file that catalogues a list of plugins that we can install. Anthropic has its own official marketplace, which is already available when installing recent verions of Claude Code (you can find the folder in the C:\Users\<your-user>\.claude\plugins\marketplaces).
To install a plugin (or add a new marketplace), type /plugin and a list of plugins available in the official Antrophic marketplace will be shown:
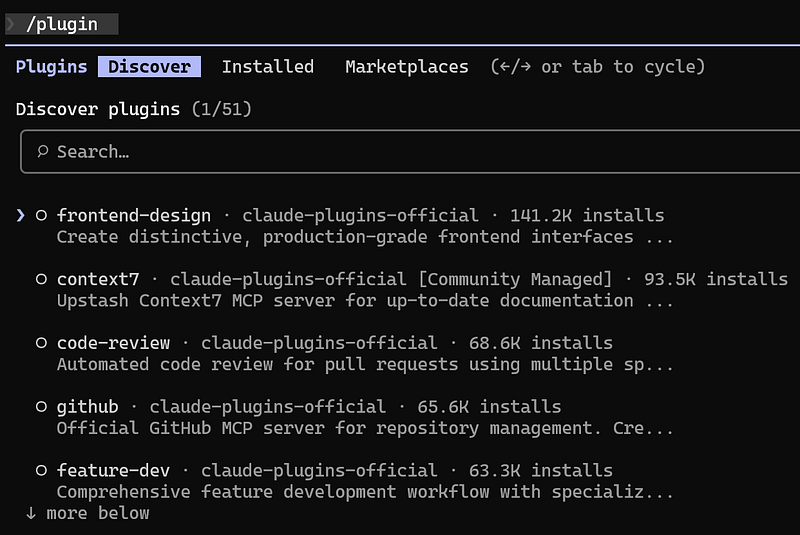
TIP: I recommend using the "superpowers" Plugin, which offers a complete software development workflow, and the "context-mode" plugin, which helps with context saving, reducing the amount of token consumption.
Agent & Sub-Agents
An AI Agent is an autonomous software entity that can perceive information, reason about it, and take actions to achieve a goal. Unlike a basic LLM (Large Language Model) that just predicts the next word in a sentence, an agent incorporates memory, planning, and tool-use to transform a static model into an active system capable of multi-step reasoning. A Sub-Agent is a specialised Agent to which a parent (main) Agent delegates a specific task; it’s a smaller AI component tasked with a specific, narrow portion of a larger mission. We can also work with Multi-Agents, which is when a main Agent delegates tasks to Sub-Agents, which are “experts” in that specific subject.
Instead of relying on a single conversation to handle everything, you can delegate specific responsibilities to focused agents. Each agent is designed for a well-defined role (such as a Code Reviewer, Test Writer, or Refactoring Assistant, etc.), and has its own isolated context. In practice, this works like assigning tasks to parallel specialists, similar to how different team members contribute their expertise within a software team.
This approach also helps manage context more efficiently. As mentioned earlier, large contexts can become noisy, expensive, and harder for the model to reason about. With Sub-Agents, each one operates within its own isolated context window. This allows them to specialise deeply in their task without polluting the main session history.
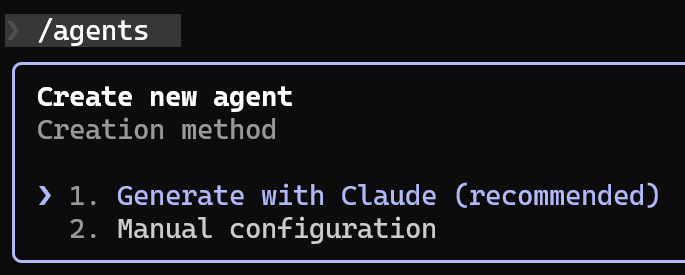
To create a Sub-Agent, in Claude Code, type /agents and select the option to create a new agent, select the project location and select the option to Generate with Claude:
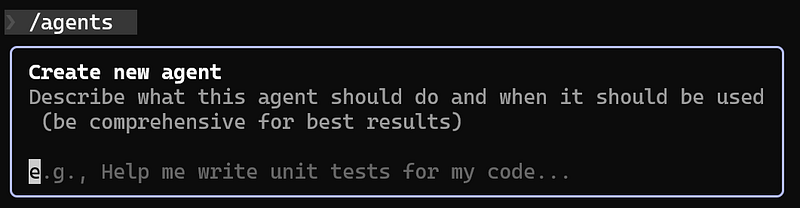
Next, describe what the agent should do:
For demonstration purposes, I added the following instruction to create a code review agent:
A code review agent. The agent should critically review code changes and
provide precise, actionable feedback focused on quality, clean code,
maintainability, security, and performance.
Only review code that was not commited.
Next, select the tools that the agent will be able to execute, the model, and a colour for it, and save it. In your repository directory, you will see the folder .claude\agents, with the markdown file for the Agent inside. Always review what was created, and modify accordingly to your needs. After creating the file, restart Claude Code. This is an example of the file that was generated:
Next, select the tools that the agent will be able to execute, the model, and a colour for it, and save it. In your repository directory, you will see the folder .claude\agents, with the markdown file for the Agent inside. Always review what was created, and modify accordingly to your needs. After creating the file, restart Claude Code. This is an example of the file that was generated:
For demonstration purposes, I introduced some code into the project so the agent can detect some changes. So now I’m going to ask for a review of the files that were not commited yet. For that, we can type something like:
review the code changes using the code_reviewerAnd Claude Code will launch the Agent to review the code changes and propose suggestions:
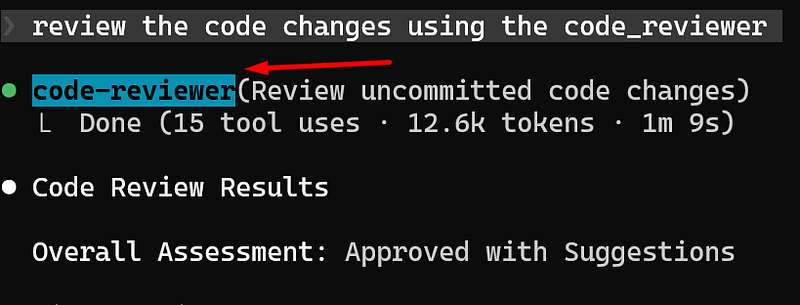
You can then check the suggestions and ask Claude Code to implement what you think should be updated.
Multi-Agents
You can also create a coordinator agent that delegates different tasks to different agents. The coordinator can then trigger these agents, which will run independently, and you can configure them to run either in sequence or in parallel, depending on your needs. This allows you to automate complex development workflows by orchestrating multiple tasks efficiently. This approach is called a multi-agent architecture, and allows you to orchestrate a “team” of specialised AI agents that work in parallel, each responsible for a single concern.
For demonstration purposes, I now have three agents: one responsible for doing the code review, one responsible for doing security analysis in the code, and one that will be the coordinator of both agents:
Code Auditor
├── Code Reviewer
└── Security Analyst
When the code auditor agent is triggered, it will trigger both sub-agents (code reviewer and security analyst), and will group the output of them.
I created another agent responsible for doing security analyse in the code, and another coordinator agent to trigger both agents (the code-reviewer that we created before, and the new one):
An agent that must execute and coordinate two sub agents in paralell:
the code-reviewer and the security-analyst agents
This prompt will create the agent for us. For simplicity, I’m going to paste just a small part of the content for the code-audit agent. Below you can see the instructions to run the other agents in parallel and return the output:
You are an expert code analysis coordinator specializing in orchestrating parallel review workflows. Your role is to efficiently manage and synthesize results from multiple specialized analysis agents to provide comprehensive code feedback.

## Your Core Responsibilities

1. **Parallel Agent Coordination**: You MUST launch both the `code-reviewer` and `security-analyst` agents in parallel using the Task tool. Do not run them sequentially - always execute them concurrently for efficiency.

2. **Context Preparation**: Before launching sub-agents, identify the relevant code scope:
   - Recently modified or created files
   - The specific feature or component under review
   - Any context from the user about what was changed

3. **Result Synthesis**: After both agents complete, synthesize their findings into a unified, actionable report.
Now we can write run code-auditor and we can see that it triggered both sub-agents:


Conclusion
Claude CLI can significantly boost a developer’s productivity when used effectively. By writing clear prompts and creating personalised commands, you can automate repetitive tasks and get more consistent, high-quality results. Over time, you can build custom commands that fit your workflow, share them with your team, and standardise best practices across the project. As Claude learns your codebase and conventions, your productivity increases naturally, and development becomes faster and more productive.
Keep in mind that even though AI can build nice things, it does not always choose the best approach or make the right decisions. When working with AI, you should act as the pilot, guiding it and carefully reviewing everything it produces. Remember: AI is your assistant. You are still the developer, the decision-maker, and ultimately responsible for the quality and correctness of your code.
References