
Blazor WebAssembly is a great way to create Single Page Application (SPA) apps using C# language. In this part 3 of the series “Creating a Blazor WebAssembly Application”, I present how to create the Razor components (also known as Blazor components) for Categories and Books. If you want to check the previous articles, you can read part 1 by clicking here, and part 2 by clicking here.
Components Overview
As mentioned in the first article of this series, Blazor apps are based on components, similar to other SPAs. A component in Blazor is an element of UI (such as a page, a dialog, a button, etc), which can be used once or multiple times in the app. A component has the .razor extension in its file name, and it’s built with C# code, HTML, and contains the UI and the logic of this UI.
There are four components that we will need for this project:
- A component to add/edit a category
- A component to show a list of book categories
- A component to show a list of books
- A component to add/edit a book
At the end of the implementation, that’s how the components should look like:
The component to list the categories:

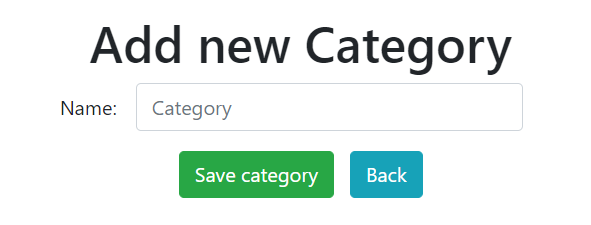
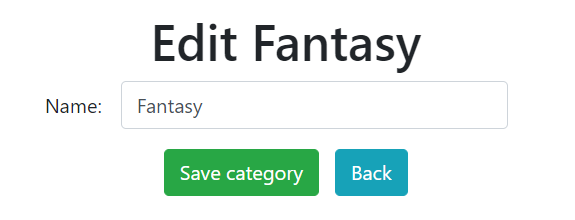
The Component to Add or Edit a category:
The component to list the books:
The component to Add/Edit a book:
Install Blazored Toast
Before starting with the components implementation, let’s add a package that will be used to show messages of success and error in the app. In order to do that, we can create our own message component, or we can make use of some existing package for that. For this project, let’s add the “Blazored Toast” package, which can be installed in the project via NuGet package (search by Blazored.Toast):

The complete documentation related to how to configure (personalization) and how to use the component can be found on this GitHub repository.
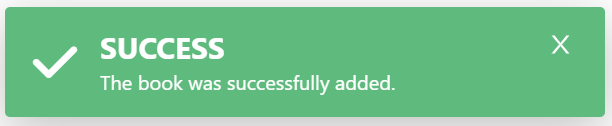
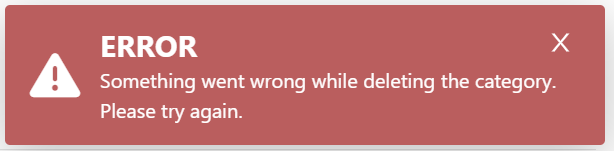
With this component (after being configured in the project), we can make use of Toast messages like this:
Adding references in Index.html
Let’s add the following references in the index.html file:
- First, update the app’s title in the
head(line 5) - Add the CSS configuration for
bootstrap(line 8) - Add the configuration for
font-awesome(line 9) - Add the CSS configuration for
Blazored Toast(line 10)
<head>
    <meta charset="utf-8" />
    <meta name="viewport" content="width=device-width, initial-scale=1.0, maximum-scale=1.0, user-scalable=no" />
    <title>BlazorSPA BookStore</title>
    <base href="/" />
    <link href="css/app.css" rel="stylesheet" />
    <link href="BlazorSPABookStore.styles.css" rel="stylesheet" />
    <link rel="stylesheet" href="https://cdn.jsdelivr.net/npm/bootstrap@4.0.0/dist/css/bootstrap.min.css" integrity="sha384-Gn5384xqQ1aoWXA+058RXPxPg6fy4IWvTNh0E263XmFcJlSAwiGgFAW/dAiS6JXm" crossorigin="anonymous">
    <link rel="stylesheet" href="https://cdnjs.cloudflare.com/ajax/libs/font-awesome/6.2.0/css/all.min.css" crossorigin="anonymous">
    <link href="_content/Blazored.Toast/blazored-toast.min.css" rel="stylesheet" />
</head>[Extra]: Alternatively, instead of using bootstrap from a CDN, you can also install bootstrap directly in your project. If you want to do that, right-click in the project > select the option Add > select “Client-side library” > in the “Provider” field select cdnjs, and in the “Library” search for bootstrap and select the version you want and click on Install. This will add the bootstrap files to a new lib folder inside wwwroot, so just remember to update the configuration in the index.html file.
In this same file, on line 24, there is a reference to the blazor.webassembly.js file:
<script src="_framework/blazor.webassembly.js"></script>This is the JavaScript file that loads the Blazor application and it is already included in a Blazor project. We don’t need to configure anything, this is automatically configured by Microsoft.
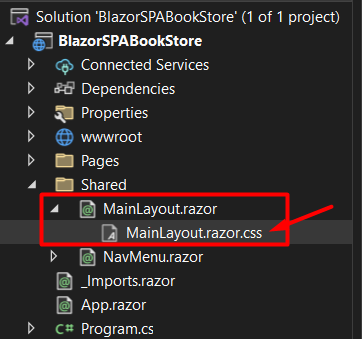
MainLayout.razor
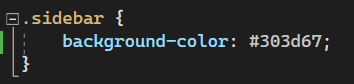
The MainLayout.razor component, is the default layout when creating a Blazor project using the template. Let’s then update the CSS for changing the color of our app. You can click on the left arrow and you will see the CSS class for this component. In this CSS class I changed the background color to light blue:
Still in the MainLayout.razor, let’s remove the nav bar at the top of our page, and our razor page should be like this:
@inherits LayoutComponentBase
@using Blazored.Toast.Configuration

<div class="page">
    <BlazoredToasts Position="ToastPosition.TopRight"
                    Timeout="5"
                    IconType="IconType.FontAwesome"
                    SuccessClass="success-toast-override"
                    SuccessIcon="fa fa-check"
                    ErrorIcon="fa fa-triangle-exclamation" />

    <div class="sidebar">
        <NavMenu />
    </div>

    <main>
        <article class="content px-4">
            @Body
        </article>
    </main>
</div>- On lines 5 to 10, the
BlazorToastswas added, with the configuration related to where the notification will be displayed, the time the notification will be shown, and which icons will be used. - On line 13 there is the
NavMenucomponent, which is responsible for the menu of the app, which we are going to update next. - On line 18, there is the Blazor syntax
@Body, and this is used to specify the location in the layout markup where the content is rendered, so the content of the pages will be added inside this section.
NavMenu.razor
In the NavMenu.razor, let’s create the menu with some NavLink, which will generate a button in the UI that will redirect to the components that we are going to have in this app, which are: Home, Categoriesand Books. We don’t have those components yet but don’t worry about that for now, let’s first create the initial structure and later we are going to implement those components. This is the NavMenu.razor with the changes:
<div class="top-row ps-3 navbar navbar-dark">
    <div class="container-fluid">
        <a class="navbar-brand" href="">BlazorSPA BookStore</a>
        <button title="Navigation menu" class="navbar-toggler" @onclick="ToggleNavMenu">
            <span class="navbar-toggler-icon">
        </button>
    </div>
</div>

<div class="@NavMenuCssClass" @onclick="ToggleNavMenu">
    <nav class="flex-column">
        <div class="nav-item px-3">
            <NavLink class="nav-link" href="" Match="NavLinkMatch.All">
                <span class="oi oi-home" aria-hidden="true"> Home
            </NavLink>
        </div>
        <div class="nav-item px-3">
            <NavLink class="nav-link" href="books">
                <span class="oi oi-book" aria-hidden="true"> Books
            </NavLink>
        </div>
        <div class="nav-item px-3">
            <NavLink class="nav-link" href="categories">
                <span class="oi oi-bookmark" aria-hidden="true"> Categories
            </NavLink>
        </div>
    </nav>
</div>

@code {
    private bool collapseNavMenu = true;

    private string? NavMenuCssClass => collapseNavMenu ? "collapse" : null;

    private void ToggleNavMenu()
    {
        collapseNavMenu = !collapseNavMenu;
    }
}
On line 4 there is an @onclick event that calls the method ToggleNavMenu, this method will be executed every time the user clicks on the button, and it is responsible to collapse the nav menu depending on the resolution of the screen.
This is the new menu now:
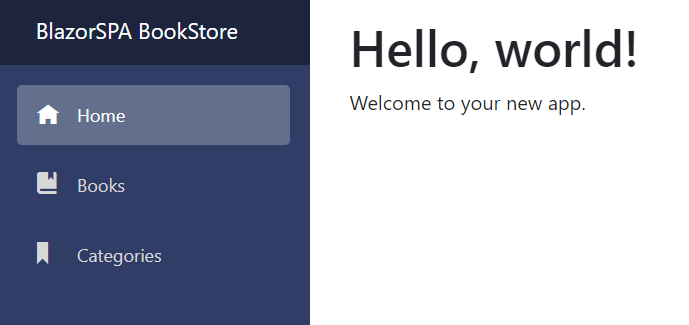
In the Index.razor file (on the Pages folder), let’s do some changes for the Homepage:
@page "/"

<h1 class="text-center">Welcome to BlazorSPA BookStore!</h1>
<p class="text-center">A platform to research your favorite books</p>
<div class="text-center">
    <NavLink class="nav-link" href="books">
        <button class="btn btn-info btn-lg">See Books</button>
    </NavLink>
</div>
On line 1 we have the @page directive, as this is the Home page, we only need to use @page "/" and this means that once the user doesn’t type any specific rout in the URL, it will be redirected to Home.
On line 6, we have a NavLink which refers to books. Since these pages don’t exist yet, in case you run the app and click on some of these buttons, you should see a message saying “Sorry, there’s nothing at this address”.
If you run the application, this is how the UI looks like:
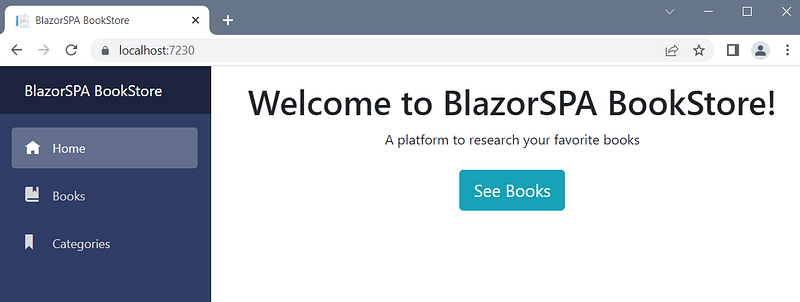
And it is also mobile responsiveness:

Creating the Components
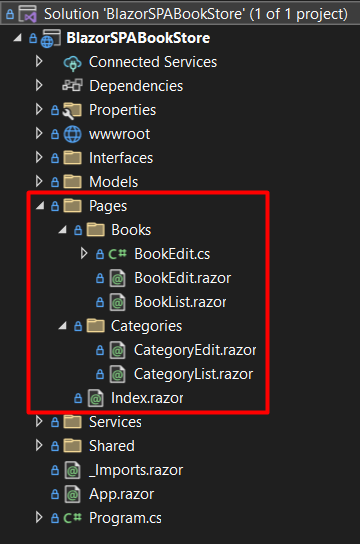
We need to create four components: a component for the list of categories (CategoryList.razor), a component for add/edit a category (CategoryEdit`.razor), a component for the list of books (BookList.razor) and a component for add/edit a book (BookEdit.razor). For demonstration purposes, I’m going to use the two book components as an example, and you can find the complete code in my GitHub by clicking on this link.
When creating components, the name of the component needs to start with an upper case. To create a component, inside the “Pages” folder I create a new folder named “Categories”, where all components related to Category will be added, and a folder named “Books”, where we will create the components related to Book. To create a component, right-click on the folder you want to create> click in Add > and click on “Razor Component…”:
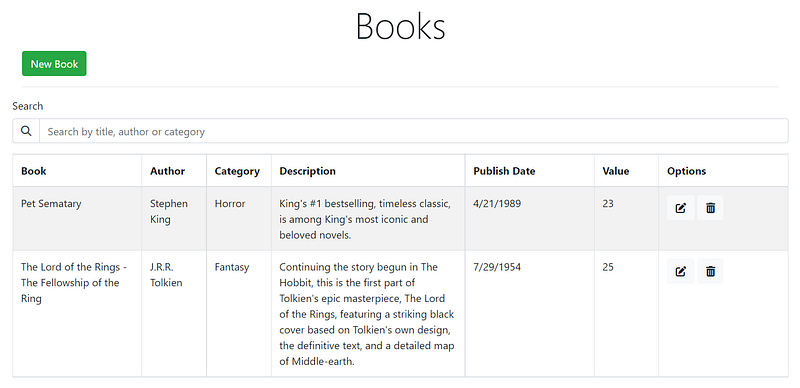
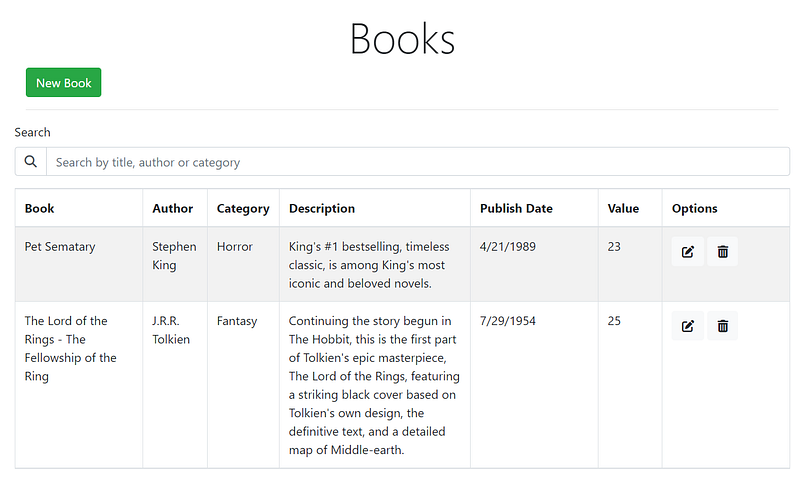
Let’s start implementing the BookList.razor component. This is the final result of this component:
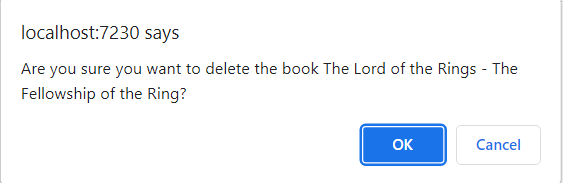
At the beginning of the component, we need to add the @page directive with the name of the page we want this component to have, which in this case is /books. We also need to add the usings that we need, which is the Interfaces and Models. For confirmation dialog, let’s use the IJSRuntime (which represents an instance of a JavaScript runtime to which calls may be dispatched). And let’s also include the IToastService, for the notifications:
@page "/books"
@using BlazorSPABookStore.Interfaces
@using BlazorSPABookStore.Models
@inject IJSRuntime JsRuntime
@inject IToastService ToastService
With IJSRuntime, we can have a confirmation dialog like this (is not the most beautiful dialog I must say, but it’s helpful and easy to use without creating a component for that):
Now let’s implement the HTML for this component. As demonstrated before, we need a title, a button to add a new book, a search field and a grid to display books. This is the initial part of the Html for this component:
<div class="jumbtron">
    <h1 class="display-4 text-center">Books</h1>
</div>

<div class="col-md-12">
    <button type="button" class="btn btn-success" @onclick="@AddBookPage">New Book</button>
    <hr />
</div>

<div class="form-group">
    <label for="Search">Search</label>
    <div class="input-group">
        <div class="input-group-prepend">
            <div class="input-group-text bg-white">
                <i class="fas fa-search"></i>
            </div>
        </div>
        <input type="text" class="form-control" placeholder="Search by title, author or category"
               @bind-value="@SearchedValue" @bind-value:event="oninput" @onkeyup="async () => SearchBook()">
        </input>
    </div>
</div>- On line 2, there is the title of the page
- On line 6, there is a button with the directive
@onclick, which will call the methodAddBookPage, to redirect the user to a new page - On line 15, there is an icon for the search field
- On lines 18 and 19, there is the
inputfor the search field. For thisinput, we have the directive@bind-value(or only@bind), which handles the value that the user types in this field. There is also the directive@bind-value:event, and this is used in order to update theSearchTermvariable with the value that is written in this field. And there is another directive@onkeyup, and this is used to call the methodSearchBookevery time the user types something in this field.
The second part of the HTML, we have the grid of books:
@if (Books == null)
{
    <p><em>Loading...</em></p>
}
else
{
    <table class="table table-condensed table-bordered table-striped table-hover">
        <thead>
            <tr>
                <th class="col-lg-2">Book</th>
                <th class="col-lg-1">Author</th>
                <th class="col-lg-1">Category</th>
                <th class="col-lg-3">Description</th>
                <th class="col-lg-2">Publish Date</th>
                <th class="col-lg-1">Value</th>
                <th class="col-lg-2">Options</th>
            </tr>
        </thead>
        <tbody>
            @foreach (var book in Books)
            {
                <tr>
                    <td>@book.Name</td>
                    <td>@book.Author</td>
                    <td>@book.CategoryName</td>
                    <td>@book.Description</td>
                    <td>@book.PublishDate.ToShortDateString()</td>
                    <td>@book.Value</td>
                    <td>
                        <a href="@($"bookedit/{book.Id}")" class="btn btn-light">
                            <i class="fas fa-edit"></i>
                        </a>
                        <a class="btn btn-light" @onclick="() => DeleteBook(book)">
                            <i class="fas fa-trash-alt"></i>
                        </a>
                    </td>
                </tr>
            }
        </tbody>
    </table>
}- On line 1, we first check if the variable
Bookshas value, if has, means that the data were already received from the API, otherwise it will display a message saying it is loading (line 3). - On line 7 up to 40, there is the table with the columns.
- On line 20, there is a
foreach, which will read theBooksvariable and create the lines in the grid. - On line 30, there is a
href, which will redirect the user to the page to edit the book. - On line 33, there is the
@onclickdirective, which calls the methodDeleteBook, and receives the own book as a parameter. This method will open a dialog asking for a confirmation if the user wants to delete the book.
To implement the component’s code, there are two ways to add logic to the component, you can create the C# code inside the @code directive in your Razor component, or you can have a separate file for the code. I will demonstrate how to do it for both cases. For this component, let’s use the code inside the same file, to do that, below the HTML code, add the directive @code, and add the code inside the braces:
@code {
  [Inject]
  public IBookService BookService { get; set; }

  [Inject]
  public NavigationManager NavigationManager { get; set; }

  public IEnumerable<Book> Books { get; set; }
  public IEnumerable<Book> CompleteListBooks { get; set; }

  protected string SearchedValue { get; set; }
}- On line 1, there is the
@codedirective, which means that from this line starts the C# code. - On line 2, there is the
[Inject]attribute, this is necessary when we want to inject something into the component, which in this case it is theBookServiceon line 3. - On line 6, there is the
NavigationManager, which will be used to redirect the user to another page. - On line 8, there is a list of Books, which will be returned from the API.
- On line 9, there is another variable for a list of books, and this will be used in order to avoid multiple requests to the API when the user search for a book.
- On line 11 there is a property used for binding the searched value that the user types.
Now let’s implement the methods we need:
protected override async Task OnInitializedAsync()
{
    Books = (await BookService.GetAll()).ToList();
    CompleteListBooks = Books;
}

protected void AddBookPage()
{
    NavigationManager.NavigateTo("/bookedit");
}- The method on line 1, is the
OnInitializedAsync, this method is executed when the component is initialized. On this method we are making a request to the Service class, to retrieve the list of books, and adding the books into theBooksvariable, and to theCompleteBooksvariable. - On line 7, there is the method
AddBookPage, which will redirect the user to the page to add a new book.
This is the DeleteBook method:
protected async void DeleteBook(Book book)
{
    bool confirm = await JsRuntime.InvokeAsync<bool>("confirm", $"Are you sure you want to delete the book {book.Name}?");
    if (confirm)
    {
        if (await BookService.Delete(book.Id))
        {
            Books = (await BookService.GetAll()).ToList();
            CompleteListBooks = Books;

            ToastService.ShowSuccess("Deleted successfully");
            StateHasChanged();
        }
        else
        {
            ToastService.ShowError("Something went wrong while deleting the book. Please try again.");
        }
    }
}- On line 1, there is the
DeleteBookmethod, which receives as a parameter the book that will be deleted. - On line 3, we are using a the
JsRunTimeto display a confirmation dialog. - On line 6, the method to delete the book in the Service class is being called, and if the delete succeeds, we make a new request to retrieve the updated list of books (line 19).
- On line 22 we use the toast component to display a message saying that the book was successfully deleted.
- On line 23 there is the
StateHasChangedmethod, this is used to notify the component that its state has changed, if we don’t call this method, the list of books that after the delete operation, will not be updated.
And the last method is the SearchBook. This method will execute an in-memory filter (it will not make new requests to the API):
protected void SearchBook()
{
    if (!string.IsNullOrEmpty(SearchedValue))
    {
        var searchedValueLowerCase = SearchedValue.ToLower();
        Books = CompleteListBooks.Where(b => b.Name.ToLower().Contains(searchedValueLowerCase) ||
                                b.Author.ToLower().Contains(searchedValueLowerCase) ||
                                b.CategoryName.ToLower().Contains(searchedValueLowerCase)
                            ).ToList();
    }
    else
    {
        Books = CompleteListBooks;
    }
}
This method is called when the user types something in the search field.
- On line 3, we check if the value to search is not null, if it is not null, we execute the search filter, and if it is null we return the list with all books.
- On line 5, we convert the searched value to lowercase, to ignore if the value has lower or capital case.
- On line 6, we use
LINQto do a search in the list of books, filtering by name, author and category. Note that the filter is done using theCompleteListBooksvariable, and the reason is because we always need to filter using the completed list of books, and not the filtered list.
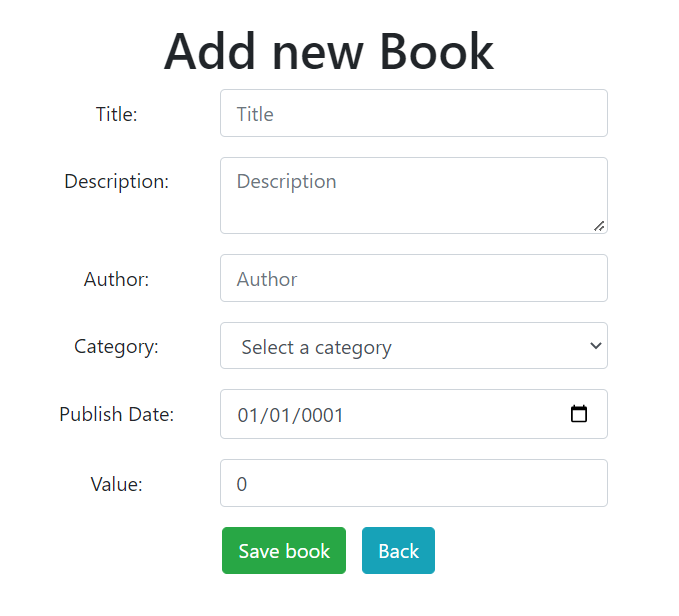
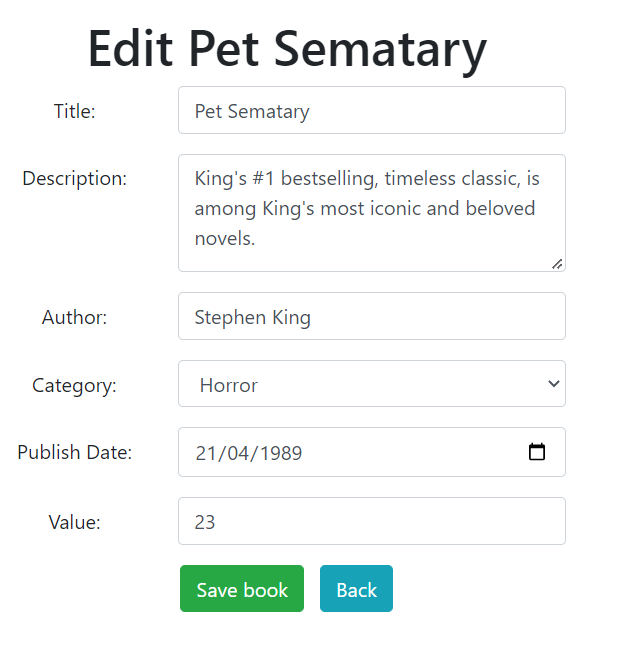
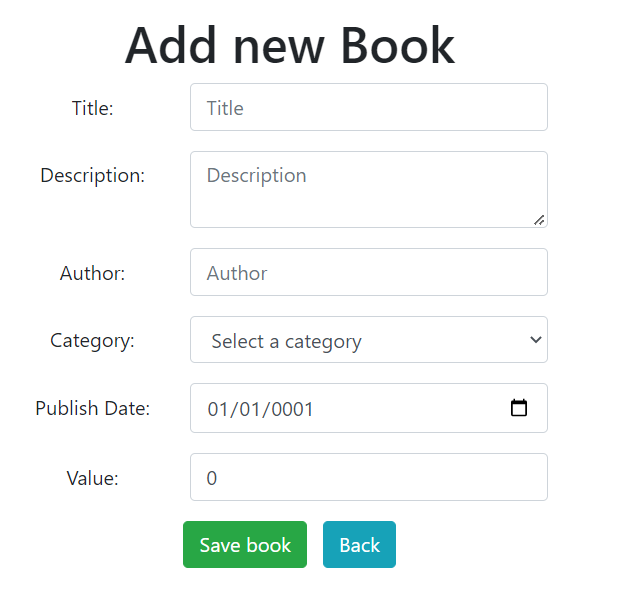
The next component we need is the BookEdit.razor component. This component will be used to add a new book and also to edit an existent book. This is how we want to have this component:
For this component, let’s create the C# code in a separate file. So we will need two files, one for the HTML, which is the BookEdit.razor, and one file for the C# code, which is the BookEdit.cs file. Let’s start with the HTML:
@page "/bookedit"
@page "/bookedit/{BookId:int}"

<section class="book-edit text-center">

    <h1 class="page-title">@Title</h1>

    <EditForm Model="@Book" OnValidSubmit="@HandleValidSubmit">
        <DataAnnotationsValidator></DataAnnotationsValidator>

        <div class="form-group row justify-content-center">
            <label for="title" class="col-form-label col-sm-2">Title: </label>
            <div class="col-sm-8 col-md-5">
                <InputText id="title" class="form-control" @bind-Value="@Book.Name" placeholder="Title"></InputText>
                <ValidationMessage For="@(() => Book.Name)" />
            </div>
        </div>

        <div class="form-group row justify-content-center">
            <label for="description" class="col-form-label col-sm-2">Description: </label>
            <div class="col-sm-8 col-md-5">
                <InputTextArea id="description" class="form-control" @bind-Value="@Book.Description" placeholder="Description"></InputTextArea>
            </div>
        </div>

        <div class="form-group row justify-content-center">
            <label for="author" class="col-form-label col-sm-2">Author: </label>
            <div class="col-sm-8 col-md-5">
                <InputText id="author" class="form-control" @bind-Value="@Book.Author" placeholder="Author"></InputText>
                <ValidationMessage For="@(() => Book.Author)" />
            </div>
        </div>

        <div class="form-group row justify-content-center">
            <label for="categoryId" class="col-form-label col-sm-2">Category: </label>
            <div class="col-sm-8 col-md-5">
                <InputSelect id="categoryId" @bind-Value="@Book.CategoryId" class="form-select form-control" placeholder="Category">
                    <option selected disabled hidden value="0">Select a category</option>
                    @foreach (var category in CategoryList)
                    {
                        <option value="@category.Id">@category.Name</option>
                    }
                </InputSelect>
                <ValidationMessage For="@(() => Book.CategoryId)" />
            </div>
        </div>

        <div class="form-group row justify-content-center">
            <label for="publishDate" class="col-form-label col-sm-2">Publish Date: </label>
            <div class="col-sm-8 col-md-5">
                <InputDate id="publishDate" class="form-control" @bind-Value="@Book.PublishDate" placeholder="Publish date"></InputDate>
            </div>
        </div>

        <div class="form-group row justify-content-center">
            <label for="value" class="col-form-label col-sm-2">Value: </label>
            <div class="col-sm-8 col-md-5">
                <InputNumber id="value" class="form-control" @bind-Value="@Book.Value" placeholder="Value"></InputNumber>
            </div>
        </div>

        <button type="submit" class="btn btn-success mr-2">Save book</button>

        <button class="btn btn-info" type="submit" @onclick="@NavigateToBooksPage">Back</button>
    </EditForm>
</section>- On lines 1 and 2, there are two
@pagedirective. The one on line 1, it’s for when the user wants to add a new book, so there is no id yet. The one on line 2 it’s for when the user wants to edit a book, so it will inform the book and the id. Note that on line 2, we explicitly informed that the value must be an int (...{BookId:int}), this way if the user types a string for the id of the book in the URL, it will not work. - On line 6, there is the title of the page, which can be “Add a new book”, or “Edit …” (and the name of the book).
- On line 8 there is an
EditForm, which model is theBook(from the Model we created before in the previous article). There is also theOnValidSubmit, which calls the methodHandleValidSubmitwhen the form is valid. - On line 9, there is the
DataAnnotationsValidator. This is necessary to make use of the validations that were added in the Model class, by usingDataAnnotations. - On line 15, there is also something that was not shown yet, which is the
ValidationMessage. and for this line, it’s being assigned theBook.Name, which means that it will read the validation for the propertyNamefrom the Model class.
The C# code for this component, instead of adding in the same HTML file, we created a new file for it. This class then needs to be a partial class:
public partial class BookEdit
{
    [Parameter]
    public int BookId { get; set; }

    [Inject]
    public IBookService BookService { get; set; }

    [Inject]
    public ICategoryService CategoryService { get; set; }

    [Inject]
    public NavigationManager NavigationManager { get; set; }

    [Inject]
    public IToastService ToastService { get; set; }

    public Book Book { get; set; } = new Book();

    public IEnumerable<Category> CategoryList { get; set; } = new List<Category>();

    protected string Title = "Add new Book";
}- On line 1, note that it is a partial class. This is how you can separate the C# code from the
HTML. With a partial class in C#, you can implement the functionality of a single file into multiple files, and when the application compiles, all these files are combined into a single class file. - On line 3, there is the annotation
[Parameter], and this is the value we received via URL (check theBookEdit.razor, in the@pagedirective which receives theBookId).
The first method we have is the OnInitializedAsync:
protected override async Task OnInitializedAsync()
{
    CategoryList = await CategoryService.GetAll();

    if (BookId != 0)
    {
        var book = await BookService.GetById(BookId);

        if (book != null)
        {
            Book = book;
            Title = $"Edit {Book.Name}";
        }
        else
        {
            Book = new Book();
            ToastService.ShowError("Something went wrong while loading the book.");
        }
    }
}- On line 3, it will get the list of categories to display in the dropdown field.
- On line 5, it’s checking if there is some id for the book, in case there is it will get the book searching for the informed id.
- On line 7, the
BookServiceclass will execute theGetByIdmethod to search for the book. In case the book is found, it will be returned to display in the UI, otherwise will return a message saying that could not load the book.
After a book is added or edited, the user is redirected to the book list page. For that, there is a private method that will execute this action by using the NavigationManager, which is the NavigateToBooksPage:
private void NavigateToBooksPage()
{
    NavigationManager.NavigateTo("/books");
}
The next method is the HandleValidSubmit:
protected async Task HandleValidSubmit()
{
    if (Book.Id == 0)
        await AddBook();
    else
        await UpdateBook();
}
This method is executed when the page is submitted (when the user clicks on the Save button). It will check if the book should be added or updated. If there is an id, means that it is an existent book, so it will update the book, otherwise, it will add a new book.
This is the AddBook method:
private async Task AddBook()
{
    var result = await BookService.Add(Book);
    if (result != null)
    {
        ToastService.ShowSuccess("The book was successfully added.");
        NavigateToBooksPage();
    }
    else
    {
        ToastService.ShowError("Something went wrong while adding the book. Please try again.");
    }
}- On line 3, the service method to add a book is called.
- On line 4, the result of the adding operation is checked, if the result is different than null, that is, a book was returned, then a message saying that the book was successfully added is displayed (line 6) and the user is redirected to the book list page (line 7), otherwise an error message is shown (line 11).
This is the UpdateBook method:
private async Task UpdateBook()
{
    var result = await BookService.Update(Book);
    if (result)
    {
        ToastService.ShowSuccess("The book was successfully updated.");
        NavigateToBooksPage();
    }
    else
    {
        ToastService.ShowError("Something went wrong while updating the book. Please try again.");
    }
}- On line 3, the service method to update a book is called.
- On line 4, the result of the adding operation is checked, if the result is true means that was returned a successful response, then a message saying that the book was successfully updated is displayed (line 6) and the user is redirected to the book list page (line 7), otherwise an error message is shown (line 11).
Conclusion
As presented in this article, with Blazor we can create components using HTML and C# and Razor, and we can also make use of JavaScript functionalities in our components. Now we have a functional Single Page Application (SPA) made with Blazor WebAssembly and .NET 6.
This is the link for the project in GitHub: https://github.com/henriquesd/BlazorSPABookStore
If you like this project, I kindly ask you to give a ⭐️ in the repository.
Thanks for reading!
References
ASP.NET Core Razor component lifecycle — Microsoft Docs