
In this article we are going to see how to create the SPA project using Angular.
To work in the SPA project we are going to use Visual Studio Code, but you can also use any other IDE. You can download Visual Studio Code here.
Creating the project
We are going to use the Angular CLI to create the project.
The Angular CLI is a command-line interface tool that you use to initialize, develop, scaffold, and maintain Angular applications.
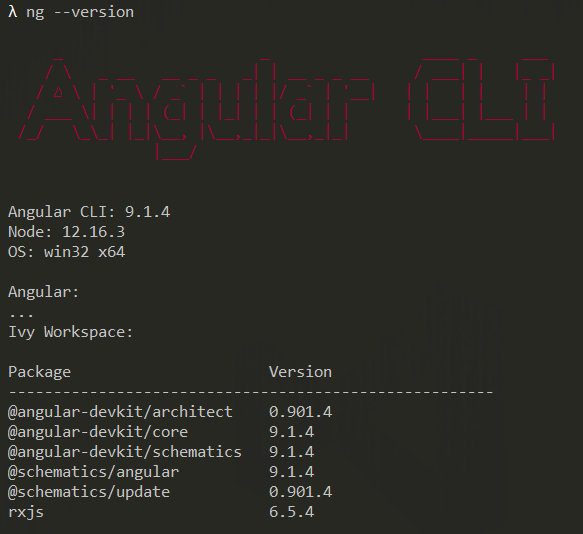
With Angular CLI you can use the command line to work with Angular. To install Angular CLI, open the command line and execute:
npm install -g @angular/cliThis is the version that I’m using:
To create the project, access the path of your project, thought command line, open the ‘src’ folder and execute:
ng new BookStore-SPAWhen asked if you would like to add Angular routing, press ‘y’, and when asked which stylesheet format would you like to use, select ‘css’.
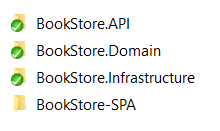
Now inside the src folder of the project, should have those four projects:
To execute the project, open the BookStore-SPA folder trought command line and execute:
ng sIf you open your browser and access http://localhost:4200/, it will display this screen:
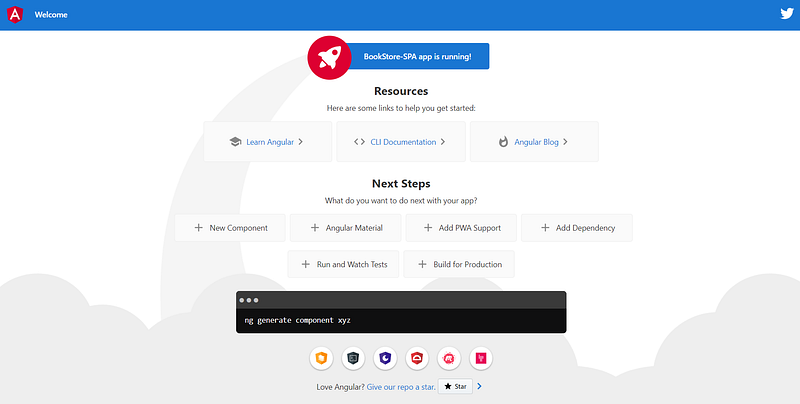
This is the default project that is created when we create the project using Angular CLI.
You can press CTRL + C, in the command line, and then press ‘y’ to stop the application, and execute this command to open visual studio code:
code .Initial Configuration
First we are going to install everything we need to be working in this project. We will use the Bootstrap and the toastr, which is used to show the messages in the application. To install these components, navigate through command line to “BookStore-SPA” folder.
Install Bootstrap
We will work with the “ngx-bootstrap”. This component allows us to work easily with the bootstrap with Angular. To install it, execute the command:
npm install --save @ng-bootstrap/ng-bootstrapIn the file “app.module” we also need to add this component:
import { NgbModule } from '@ng-bootstrap/ng-bootstrap';And in the imports we need to add the “NgbModule”:
imports: [
   BrowserModule,
   AppRoutingModule,
   NgbModule
],
Install toastr
We are going to use the toastr (you can see more information about the toastr clicking here) to display messages in the application, for that we need to add those two packages:
npm install ngx-toastr --save
npm install @angular/animations --save
And we need to add the CSS in the “angular.json” file:
"node_modules/ngx-toastr/toastr.css"
And we need to add in the imports on the “app.module.ts”:
import { BrowserAnimationsModule } from '@angular/platform-browser/animations';
import { ToastrModule } from 'ngx-toastr';
And include them on the imports array:
BrowserAnimationsModule,
ToastrModule.forRoot()
In this same import arrays, we also need to import and add the HttpClientModule and the FormsModule:
import { HttpClientModule } from '@angular/common/http';
import { FormsModule } from '@angular/forms';

[...]

imports: [
	BrowserModule,
	AppRoutingModule,
	HttpClientModule,
	FormsModule,
	NgbModule,
	BrowserAnimationsModule,
	ToastrModule.forRoot()
],
We also need to install the localize:
ng add @angular/localizeWe need to include the reference to the bootstrap.css and font-awesome.min.css, in the “index.html” file (you can add those lines below the icon’s link). This is how the file must be:
<!DOCTYPE html>
<html lang="en">

<head>
    <base href="/">
    <meta charset="utf-8">
    <meta name="viewport" content="width=device-width, initial-scale=1, shrink-to-fit=no">
    <link rel="icon" type="image/x-icon" href="favicon.ico">

    <link rel="stylesheet" href="https://cdnjs.cloudflare.com/ajax/libs/twitter-bootstrap/4.3.1/css/bootstrap.css" crossorigin="anonymous">
    <link rel="stylesheet" href="https://cdnjs.cloudflare.com/ajax/libs/font-awesome/5.13.0/css/all.min.css" crossorigin="anonymous">
</head>

<body>
    <app-root></app-root>
</body>

</html>
Creating the Models
Inside the “app” folder, let’s create the folder “_models” and the folder “_services”. In the models folder we will have our entities, that are the Book and the Category:
Category class:
export class Category {
    id: number;
    name: string;
}
Book class:
export class Book {
    id: number;
    name: string;
    author: string;
    description: string;
    value: number;
    publishDate: any;
    categoryId: number;
}
Creating the Services
In the services folder we will have a service class for book, another for the category and another for the confirmation dialog:
Inside the “_services” folder we are going to create the files: “confirmation-dialog.service.ts”, “book.service.ts” and “category.service.ts”.
This is the “confirmation-dialog.service.ts”:
import { Injectable } from '@angular/core';

import { NgbModal } from '@ng-bootstrap/ng-bootstrap';
import { ConfirmationDialogComponent } from '../confirmation-dialog/confirmation-dialog.component';

@Injectable()
export class ConfirmationDialogService {

  constructor(private modalService: NgbModal) { }

  public confirm(
    title: string,
    message: string,
    btnOkText: string = 'Ok',
    btnCancelText: string = 'Cancel',
    dialogSize: 'sm'|'lg' = 'sm'): Promise<boolean> {
    const modalRef = this.modalService.open(ConfirmationDialogComponent, { size: dialogSize });
    modalRef.componentInstance.title = title;
    modalRef.componentInstance.message = message;
    modalRef.componentInstance.btnOkText = btnOkText;
    modalRef.componentInstance.btnCancelText = btnCancelText;

    return modalRef.result;
  }
}
The ConfirmationDialogComponent do not exist yet, but we are going to creat it later.
It’s a good approach to add the URL of the API in the file “environment.ts”. And then the services class can use this URL from the environment file:
export const environment = {
  production: false,
  baseUrl: 'https://localhost:5001/'
};
In the Category and the Book Service classes, we will have methods that execute the CRUD operations and also do searching:
- Add
- Update
- Get all
- Get by id
- Delete
- Search
This is the TypeScript file from the Category Service:
import { Injectable } from '@angular/core';
import { HttpClient } from '@angular/common/http';
import { Category } from '../_models/Category';
import { Observable } from 'rxjs';
import { environment } from 'src/environments/environment';

@Injectable({
    providedIn: 'root'
})
export class CategoryService {
    private baseUrl: string = environment.baseUrl + 'api/';

    constructor(private http: HttpClient) { }

    public addCategory(category: Category) {
        return this.http.post(this.baseUrl + 'Categories', category);
    }

    public updateCategory(id: number, category: Category) {
        return this.http.put(this.baseUrl + 'categories/' + id, category);
    }

    public getCategories(): Observable<Category[]> {
        return this.http.get<Category[]>(this.baseUrl + `categories`);
    }

    public deleteCategory(id: number) {
        return this.http.delete(this.baseUrl + 'categories/' + id);
    }

    public getCategoryById(id): Observable<Category> {
        return this.http.get<Category>(this.baseUrl + 'categories/' + id);
    }

    public search(name: string): Observable<Category[]> {
        return this.http.get<Category[]>(`${this.baseUrl}categories/search/${name}`);
    }
}
This is the TypeScript file from the Book Service:
import { Injectable } from '@angular/core';
import { HttpClient } from '@angular/common/http';
import { Book } from '../_models/Book';
import { Observable } from 'rxjs';
import { environment } from 'src/environments/environment';

@Injectable({
    providedIn: 'root'
})
export class BookService {
    private baseUrl: string = environment.baseUrl + 'api/';

    constructor(private http: HttpClient) { }

    public addBook(book: Book) {
        return this.http.post(this.baseUrl + 'books', book);
    }

    public updateBook(id: number, book: Book) {
        return this.http.put(this.baseUrl + 'books/' + id, book);
    }

    public getBooks(): Observable<Book[]> {
        return this.http.get<Book[]>(this.baseUrl + `books`);
    }

    public deleteBook(id: number) {
        return this.http.delete(this.baseUrl + 'books/' + id);
    }

    public getBookById(id): Observable<Book> {
        return this.http.get<Book>(this.baseUrl + 'books/' + id);
    }

    public searchBooksWithCategory(searchedValue: string): Observable<Book[]> {
        return this.http.get<Book[]>(`${this.baseUrl}books/search-book-with-category/${searchedValue}`);
    }
}
We also need to add those services in the “app.module.ts”, adding the import and adding in the providers:
import { BookService } from './_services/book.service';
import { CategoryService } from './_services/category.service';
import { ConfirmationDialogService } from './_services/confirmation-dialog.service';

providers: [
    BookService,
    CategoryService,
    ConfirmationDialogService
],
Components
A Component is basically classes that will interact with the HTML that will be displayed in the browser.
Every Angular application has at least one component, the root component that connects a component hierarchy with the page document object model (DOM). Each component defines a class that contains application data and logic, and is associated with an HTML template that defines a view to be displayed in a target environment.
When we add the decorator “@Component” in the file, means that this file is a component.
The Component Structure
A component usually has four files:
- The TypeScript file — this file is where we add the methods and the logic of the component
- The HTML file — this file is where we add the HTML code of the component
- The CSS file — this file is where we add the CSS of the component
- The Spec file — this file is where we add the unit test for the component
In the Angular official documentation you can read more about it clicking here.
Creating the Components
We will have eight components in the application:
- Book Component — which will be used to add and edit a book
- Book List Component — which will be used to list all the books and to filter
- Category Component — which will be used to add and edit a category
- Category List Component — which will be used to list all the categories and to filter
- Home Component — which will be used to display the home page
- Nav Component — which will be used to implement the application’s nav bar
- Confirmation Dialog Component — which will be used to display confirmation messages
- DatePicker Component — which will be used to set a date in an input field
In the “app” folder, create two new folders, the “books” and the “categories” folder:
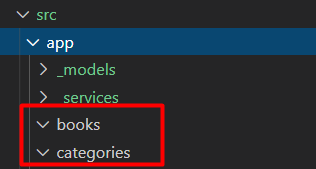
The structure of the components will be like this:
We can create the components through the command line. Let’s starting creating the category component. Do to it, navigate to the categories folder in the SPA project (BookStore-SPA\src\app\categories), and let’s create the component with the command:
ng g c categoryLet’s also create the list component for the categories:
ng g c category-listLets to the same for the books, but of course let’s create the components inside the books folder. Navigate to the books folder and create the components:
ng g c book
ng g c book-list
The other components that we need, we can create inside the folder “app”:
ng g c home
ng g c nav
ng g c confirmation-dialog
The Date Picker Component we can create manually, so for that create a new folder with the name “datepicker”, inside the “app” folder, and create two files, the “datepicker-popup.html” and the “datepicker-popup.ts”.
This is how the structure of the application must be now:
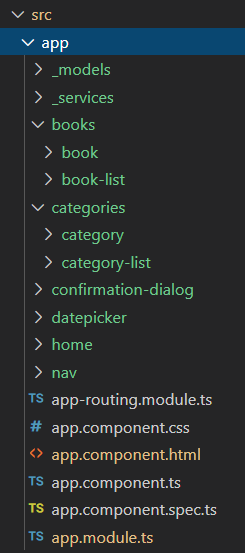
Now we have all the components that we need. So let’s start implementing them.
App Component
In the HTML file of this component, we need to add this code:
<app-nav></app-nav>
<router-outlet></router-outlet>
Nav Component
This component is used to display the navigation bar in the header of the application. On this navigation bar we will have the options to go to the home page, to the books list page and to the categories list page.
This is the code of the HTML file:
<nav class="navbar navbar-expand-md navbar-dark fixed-top bg-primary">
  <a class="navbar-brand" [routerLink]="['/home']">BookStore</a>

  <ul class="navbar-nav mr-auto">
    <a class="nav-link" [routerLink]="['/books']">Books</a>
    <a class="nav-link" [routerLink]="['/categories']">Categories</a>
  </ul>
</nav>
We use the “routerLink” to redirect to the defined page.
Home component
This is the code in the TypeScript file:
<div class="title-home container mt-5 text-center">
    <h1>Welcome to BookStore</h1>
    <p class="lead">A platform to search about your preferred books</p>
    <div class="text-center">
        <button class="btn btn-info btn-lg" [routerLink]="['/books']">See Books</button>
    </div>
</div>
In the css file we can add this:
.title-home {
padding-top: 60px;
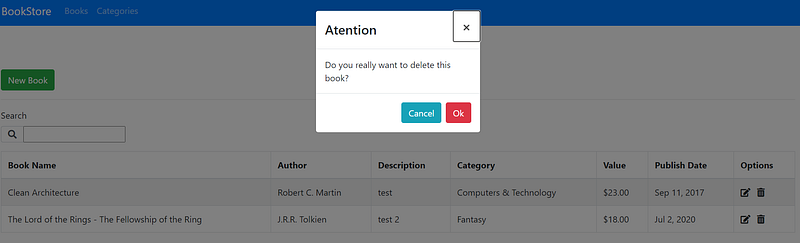
}Confirmation Dialog Component
This component we are going to use in the confirmation messages for when the user clicks in the button to delete a record.
This is the code in the HTML file:
<div class="modal-header">
<h4 class="modal-title" id="modal-title">{{ title }}</h4>
<button type="button" class="close" aria-describedby="modal-title" (click)="dismiss()">
<span aria-hidden="true">×
</button>
</div>
<div class="modal-body">
{{ message }}
</div>
<div class="modal-footer">
<button type="button" class="btn btn-info" (click)="dismiss()">{{ btnCancelText }}</button>
<button type="button" class="btn btn-danger" (click)="accept()"> {{ btnOkText }}</button>
</div>This is the TypeScript file:
import { Component, Input, OnInit } from '@angular/core';
import { NgbActiveModal } from '@ng-bootstrap/ng-bootstrap';

@Component({
  selector: 'app-confirmation-dialog',
  templateUrl: './confirmation-dialog.component.html',
  styleUrls: ['./confirmation-dialog.component.css']
})
export class ConfirmationDialogComponent implements OnInit {

  @Input() title: string;
  @Input() message: string;
  @Input() btnOkText: string;
  @Input() btnCancelText: string;

  constructor(private activeModal: NgbActiveModal) { }

  ngOnInit() {
  }

  public decline() {
    this.activeModal.close(false);
  }

  public accept() {
    this.activeModal.close(true);
  }

  public dismiss() {
    this.activeModal.dismiss();
  }
}
DatePicker Component
For DatePicker we are going to use the DatePicker from the NgBootstrap, you can found more information about this component here.
This is the HTML:
<div class="input-group">
  <input class="form-control" [placeholder]="placeholder" name="dp" [(ngModel)]="model" ngbDatepicker
   #d="ngbDatepicker">
  <div class="input-group-append">
    <button class="btn btn-outline-secondary fa fa-calendar-alt" (click)="d.toggle()" type="button"></button>
  </div>
</div>
This is the TypeScript file:
import {Component, OnInit, Input} from '@angular/core';
import {NgbDateStruct} from '@ng-bootstrap/ng-bootstrap';

@Component({
  selector: 'ngbd-datepicker-popup',
  templateUrl: './datepicker-popup.html'
})

export class NgbdDatepickerPopup implements OnInit {
  model: NgbDateStruct;

  @Input() placeholder: string;

  constructor() { }

  ngOnInit() {
  }
}
We have a property named “placeholder” because then when we use this component, we can set the placeholder that we want.
We also need to add this component in the file “app.module.ts”, so add the import and the component in the declarations:
import { NgbdDatepickerPopup } from './datepicker/datepicker-popup';

declarations: [
    [...]

    NgbdDatepickerPopup
],
Category List Component
In the HTML of this component, we will have a grid with the available categories, with the options to edit or remove a category. We will also have a search field to search the categories.
This is the HTML:
<div class="jumbtron">
  <h1 class="display-4 text-center">Categories</h1>
</div>

<div class="col-md-12">
  <button type="button" class="btn btn-success" (click)="addCategory()">New Category</button>
  <hr />

  <div class="form-group">
    <label for="Search">Search</label>
    <div class="input-group">
      <div class="input-group-prepend">
        <div class="input-group-text bg-white">
          <i class="fas fa-search"></i>
        </div>
      </div>
      <input type="text" [(ngModel)]="searchTerm" (ngModelChange)="searchCategories()" />
    </div>
  </div>

  <table class="table table-condensed table-bordered table-striped table-hover">
    <thead>
      <tr>
        <th class="col-md-7">Category</th>
        <th>Options</th>
      </tr>
    </thead>
    <tbody>
      <tr *ngFor="let category of categories">
        <td>{{category.name}}</td>
        <td class="action-button-column">
          <a title="Edit" (click)="editCategory(category.id)"><i class="fas fa-edit"></i> </a>
          <a title="Delete" (click)="deleteCategory(category.id)" style="margin-left: 12px;"><i
              class="fas fa-trash-alt"></i> </a>
        </td>
      </tr>
    </tbody>

  </table>
</div>
This is the TypeScript file:
import { Component, OnInit } from '@angular/core';
import { Router } from '@angular/router';
import { CategoryService } from 'src/app/_services/category.service';
import { ToastrService } from 'ngx-toastr';
import { ConfirmationDialogService } from 'src/app/_services/confirmation-dialog.service';
import { Subject } from 'rxjs';
import { debounceTime } from 'rxjs/operators';

@Component({
  selector: 'app-category-list',
  templateUrl: './category-list.component.html',
  styleUrls: ['./category-list.component.css']
})
export class CategoryListComponent implements OnInit {
  public categories: any;
  public searchTerm: string;
  public searchValueChanged: Subject<string> = new Subject<string>();

  constructor(private router: Router,
              private service: CategoryService,
              private toastr: ToastrService,
              private confirmationDialogService: ConfirmationDialogService) { }

  ngOnInit(): void {
    this.getCategories();

    this.searchValueChanged.pipe(debounceTime(1000))
      .subscribe(() => {
        this.search();
      });
  }

  private getCategories() {
    this.service.getCategories().subscribe(categories => {
      this.categories = categories;
    });
  }

  public addCategory() {
    this.router.navigate(['/category']);
  }

  public editCategory(categoryId: number) {
    this.router.navigate(['/category/' + categoryId]);
  }

  public deleteCategory(categoryId: number) {
    this.confirmationDialogService.confirm('Atention', 'Do you really want to delete this category?')
      .then(() =>
        this.service.deleteCategory(categoryId).subscribe(() => {
          this.toastr.success('The category has been deleted');
          this.getCategories();
        },
          error => {
            this.toastr.error('Failed to delete the category.');
          }))
      .catch(() => '');
  }

  public searchCategories() {
    this.searchValueChanged.next();
  }

  private search() {
    if (this.searchTerm !== '') {
      this.service.search(this.searchTerm).subscribe(category => {
        this.categories = category;
      }, error => {
        this.categories = [];
      });
    } else {
      this.service.getCategories().subscribe(categories => this.categories = categories);
    }
  }
}
You can see in line 28 that we are using a debounceTime(1000) in the searchValueChanged, and this is because with that we can set a timer to this property, so when the user types something in the searching field, it will wait some seconds to do the searching, otherwise if we do not do this, for each letter the user type it would be executed a search operation.
In the CSS file we will have this:
.jumbtron {
padding-top: 60px;
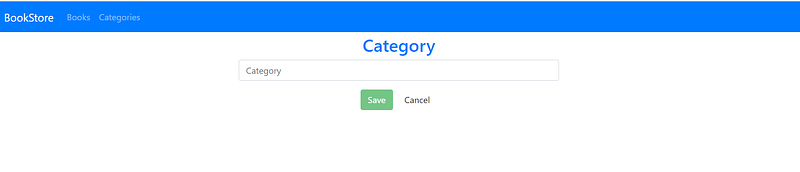
}Category Component
This component will be used to create a new category or to edit an existent category.
This is the HTML of the category component:
<div class="jumbtron">
  <form #form="ngForm" (submit)="onSubmit(form)" autocomplete="off" class="col-md-5 form">
    <h2 class="text-center text-primary">Category</h2>
    <input type="hidden" name="id" #id="ngModel" [(ngModel)]="formData.id">
    <div class="form-group">
      <input name="name" #name="ngModel" [(ngModel)]="formData.name" class="form-control" required
        [ngClass]="{'is-invalid': form.controls['name']?.invalid && form.controls['name']?.touched}"
        placeholder="Category">
      <div class="invalid-feedback" *ngIf="name.invalid && name.touched">Please inform the category.</div>
    </div>
    <div class="form-group text-center">
      <button class="btn btn-success mr-2" [disabled]="form.invalid" type="submit">Save</button>
      <button class="btn btn-default" type="button" (click)="cancel()">Cancel</button>
    </div>
  </form>
</div>
This is the TypeScript file:
import { Component, OnInit } from '@angular/core';
import { ActivatedRoute, Router } from '@angular/router';
import { NgForm } from '@angular/forms';
import { Category } from 'src/app/_models/Category';
import { ToastrService } from 'ngx-toastr';
import { CategoryService } from 'src/app/_services/category.service';

@Component({
  selector: 'app-category',
  templateUrl: './category.component.html',
  styleUrls: ['./category.component.css']
})
export class CategoryComponent implements OnInit {
  public formData: Category;

  constructor(public service: CategoryService,
              private router: Router,
              private route: ActivatedRoute,
              private toastr: ToastrService) { }

  ngOnInit() {
    this.resetForm();

    let id;
    this.route.params.subscribe(params => {
      id = params['id'];
    });

    if (id != null) {
      this.service.getCategoryById(id).subscribe(category => {
        this.formData = category;
      }, error => {
        this.toastr.error('An error occurred on get the record.');
      });
    } else {
      this.resetForm();
    }
  }

 private resetForm(form?: NgForm) {
    if (form != null) {
      form.form.reset();
    }

    this.formData = {
      id: 0,
      name: ''
    };
  }

  public onSubmit(form: NgForm) {
    if (form.value.id === 0) {
      this.insertRecord(form);
    } else {
      this.updateRecord(form);
    }
  }

  public insertRecord(form: NgForm) {
    this.service.addCategory(form.form.value).subscribe(() => {
      this.toastr.success('Registration successful');
      this.resetForm(form);
      this.router.navigate(['/categories']);
    }, () => {
      this.toastr.error('An error occurred on insert the record.');
    });
  }

  public updateRecord(form: NgForm) {
    this.service.updateCategory(form.form.value.id, form.form.value).subscribe(() => {
      this.toastr.success('Updated successful');
      this.resetForm(form);
      this.router.navigate(['/categories']);
    }, () => {
      this.toastr.error('An error occurred on update the record.');
    });
  }

  public cancel() {
    this.router.navigate(['/categories']);
  }
}
This is the CSS:
.form {
	margin: 0 auto !important;
	float: none !important;
}

.jumbtron {
	padding-top: 60px;
}
Book List Component
In the HTML of this component, we will have a grid with the available books, with the options to edit or remove a book. We will also have a search field to search the books.
This component is similar to the category list component, the biggest difference it’s because on this component we have more properties.
This is the HTML:
<div class="jumbtron">
  <h1 class="display-4 text-center">Books</h1>
</div>

<div class="col-md-12">
  <button type="button" class="btn btn-success" (click)="addBook()">New Book</button>
  <hr/>

  <div class="form-group">
      <label for="Search">Search</label>
      <div class="input-group">
        <div class="input-group-prepend">
          <div class="input-group-text bg-white">
              <i class="fas fa-search"></i>
          </div>
        </div>
        <input type="text" [(ngModel)]="searchTerm" (ngModelChange)="searchBooks()"/>
      </div>
    </div>

  <table class="table table-condensed table-bordered table-striped table-hover">
      <thead>
          <tr>
          <th>Book Name</th>
          <th>Author</th>
          <th>Description</th>
          <th>Category</th>
          <th>Value</th>
          <th>Publish Date</th>
          <th>Options</th>
        </tr>
      </thead>
      <tbody>
        <tr *ngFor="let book of books">
          <td>{{book.name}}</td>
          <td>{{book.author}}</td>
          <td>{{book.description.length > 25 ? (book.description | slice : 0:25) + '...' : book.description}}</td>
          <td>{{book.categoryName}}</td>
          <td>{{book.value | currency}}</td>
          <td>{{book.publishDate | date: 'mediumDate'}}</td>
          <td class="action-button-column">
              <a title="Edit" (click)="editBook(book.id)"><i class="fas fa-edit"></i> </a>
              <a title="Delete" (click)="deleteBook(book.id)" style="margin-left: 12px;"><i class="fas fa-trash-alt"></i> </a>
          </td>
        </tr>
      </tbody>

  </table>
</div>
You can find a commented code in the TypeScript file, and this is just there to give an example of how you could use the searching using only the front-end if you want. This is the TypeScript file:
import { Component, OnInit } from '@angular/core';
import { Router } from '@angular/router';
import { BookService } from 'src/app/_services/book.service';
import { ToastrService } from 'ngx-toastr';
import { ConfirmationDialogService } from 'src/app/_services/confirmation-dialog.service';
import { Subject } from 'rxjs';
import { debounceTime } from 'rxjs/operators';

@Component({
  selector: 'app-book-list',
  templateUrl: './book-list.component.html',
  styleUrls: ['./book-list.component.css']
})
export class BookListComponent implements OnInit {
  public books: any;
  public listComplet: any;
  public searchTerm: string;
  public searchValueChanged: Subject<string> = new Subject<string>();

  constructor(private router: Router,
              private service: BookService,
              private toastr: ToastrService,
              private confirmationDialogService: ConfirmationDialogService) { }

  ngOnInit() {
    this.getValues();

    this.searchValueChanged.pipe(debounceTime(1000))
    .subscribe(() => {
      this.search();
    });
  }

  private getValues() {

    this.service.getBooks().subscribe(books => {
      this.books = books;
      this.listComplet = books;
    });
  }

  public addBook() {
    this.router.navigate(['/book']);
  }

  public editBook(bookId: number) {
    this.router.navigate(['/book/' + bookId]);
  }

  public deleteBook(bookId: number) {
    this.confirmationDialogService.confirm('Atention', 'Do you really want to delete this book?')
      .then(() =>
        this.service.deleteBook(bookId).subscribe(() => {
          this.toastr.success('The book has been deleted');
          this.getValues();
        },
          err => {
            this.toastr.error('Failed to delete the book.');
          }))
      .catch(() => '');
  }

  // Use the code below if you want to filter only using the front end;
  // public search() {
  //   const value = this.searchTerm.toLowerCase();
  //   this.books = this.listComplet.filter(
  //     book => book.name.toLowerCase().startsWith(value, 0) ||
  //       book.author.toLowerCase().startsWith(value, 0) ||
  //       book.description.toString().startsWith(value, 0) ||
  //       book.value.toString().startsWith(value, 0) ||
  //       book.publishDate.toString().startsWith(value, 0));
  // }

  public searchBooks() {
    this.searchValueChanged.next();
  }

  private search() {
    if (this.searchTerm !== '') {
      this.service.searchBooksWithCategory(this.searchTerm).subscribe(book => {
        this.books = book;
      }, error => {
        this.books = [];
      });
    } else {
      this.service.getBooks().subscribe(books => this.books = books);
    }
  }
}
This is the CSS file:
.jumbtron {
padding-top: 60px;
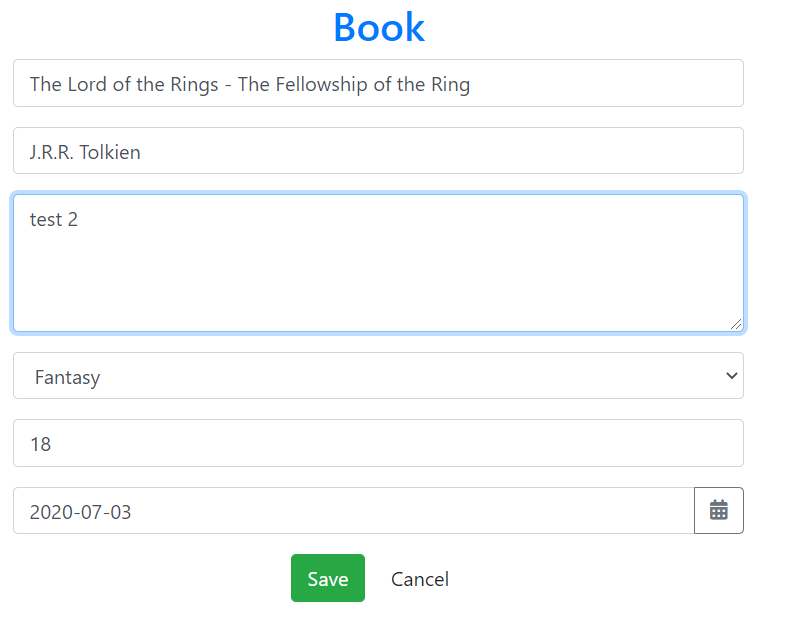
}Book Component
This component will be used to create a new book or to edit an existent book.
This is the HTML:
<div class="jumbtron">
  <form #form="ngForm" (submit)="onSubmit(form)" autocomplete="off" class="col-md-5 form">
    <h2 class="text-center text-primary">Book</h2>
    <input type="hidden" name="id" #id="ngModel" [(ngModel)]="formData.id">
    <div class="form-group">
      <input name="name" #name="ngModel" [(ngModel)]="formData.name" class="form-control" required
        [ngClass]="{'is-invalid': form.controls['name']?.invalid && form.controls['name']?.touched}" placeholder="Name">
      <div class="invalid-feedback" *ngIf="name.invalid && name.touched">Please inform the book's name.</div>
    </div>
    <div class="form-group">
      <input name="author" #author="ngModel" [(ngModel)]="formData.author" class="form-control" placeholder="Author"
        [ngClass]="{'is-invalid': form.controls['author']?.invalid && form.controls['author']?.touched}" required>
      <div class="invalid-feedback" *ngIf="author.invalid && author.touched">Please inform the author's name.</div>
    </div>
    <div class="form-group">
      <textarea name="description" #description="ngModel" [(ngModel)]="formData.description" class="form-control"
        placeholder="Description"
        [ngClass]="{'is-invalid': form.controls['description']?.invalid && form.controls['description']?.touched}"
        required rows="4"></textarea>
      <div class="invalid-feedback" *ngIf="description.invalid && description.touched">Please inform the description
      </div>
    </div>
    <div class="form-group">
      <select class="form-control" name="categoryId" #categoryId [(ngModel)]="formData.categoryId" required>
        <option value="null" disabled selected hidden>Category</option>
        <option *ngFor="let category of categories" value="{{category.id}}">
          {{category.name}}
        </option>
      </select>
      <div class="invalid-feedback" *ngIf="categoryId.invalid && categoryId.touched">Please inform the category</div>
    </div>
    <div class="form-group">
      <input name="value" #value="ngModel" [(ngModel)]="formData.value" class="form-control" placeholder="Value"
        type="number" [ngClass]="{'is-invalid': form.controls['value']?.invalid && form.controls['value']?.touched}"
        required>
      <div class="invalid-feedback" *ngIf="value.invalid && value.touched">Please inform the value</div>
    </div>
    <div class="form-group">
      <div class="input-group">
        <input class="form-control" placeholder="Publish Date" id="publishDate" name="publishDate" ngbDatepicker
          #d="ngbDatepicker" #publishDate="ngModel" [(ngModel)]="formData.publishDate" class="form-control" type="text"
          [(ngModel)]="formData.publishDate" [minDate]="{year: 1800, month: 1, day: 1}"
          [ngClass]="{'is-invalid': form.controls['publishDate']?.invalid && form.controls['publishDate']?.touched}"
          required>
        <div class="input-group-append">
          <button class="btn btn-outline-secondary fa fa-calendar-alt" (click)="d.toggle()" type="button"></button>
        </div>
        <div class="invalid-feedback" *ngIf="publishDate.invalid && publishDate.touched">Please inform the publish date
        </div>
      </div>
    </div>
    <div class="form-group text-center">
      <button class="btn btn-success mr-2" [disabled]="form.invalid" type="submit">Save</button>
      <button class="btn btn-default" type="button" (click)="cancel()">Cancel</button>
    </div>

  </form>
</div>
You can see that we have an “invalid-feedback” div, and this is used to display a error message to the user, for example if the user click on the field, and left it empty, it will be displayed that the field is required.
This is the TypeScript file:
import { Component, OnInit } from '@angular/core';
import { ActivatedRoute, Router } from '@angular/router';
import { NgForm } from '@angular/forms';
import { Book } from 'src/app/_models/Book';
import { BookService } from 'src/app/_services/book.service';
import { ToastrService } from 'ngx-toastr';
import { CategoryService } from 'src/app/_services/category.service';

@Component({
  selector: 'app-book',
  templateUrl: './book.component.html',
  styleUrls: ['./book.component.css']
})
export class BookComponent implements OnInit {
  public formData: Book;
  public categories: any;

  constructor(public service: BookService,
              private categoryService: CategoryService,
              private router: Router,
              private route: ActivatedRoute,
              private toastr: ToastrService) { }

  ngOnInit() {
    this.resetForm();
    let id;
    this.route.params.subscribe(params => {
      id = params['id'];
    });

    if (id != null) {
      this.service.getBookById(id).subscribe(book => {
        this.formData = book;
        const publishDate =  new Date(book.publishDate);
        this.formData.publishDate = { year: publishDate.getFullYear(), month: publishDate.getMonth(), day: publishDate.getDay() };
      }, err => {
        this.toastr.error('An error occurred on get the record.');
      });
    } else {
      this.resetForm();
    }

    this.categoryService.getCategories().subscribe(categories => {
      this.categories = categories;
    }, err => {
      this.toastr.error('An error occurred on get the records.');
    });
  }

  public onSubmit(form: NgForm) {
    form.value.categoryId = Number(form.value.categoryId);
    form.value.publishDate = this.convertStringToDate(form.value.publishDate);
    if (form.value.id === 0) {
      this.insertRecord(form);
    } else {
      this.updateRecord(form);
    }
  }

  public insertRecord(form: NgForm) {
    this.service.addBook(form.form.value).subscribe(() => {
      this.toastr.success('Registration successful');
      this.resetForm(form);
      this.router.navigate(['/books']);
    }, () => {
      this.toastr.error('An error occurred on insert the record.');
    });
  }

  public updateRecord(form: NgForm) {
    this.service.updateBook(form.form.value.id, form.form.value).subscribe(() => {
      this.toastr.success('Updated successful');
      this.resetForm(form);
      this.router.navigate(['/books']);
    }, () => {
      this.toastr.error('An error occurred on update the record.');
    });
  }

  public cancel() {
    this.router.navigate(['/books']);
  }

  private resetForm(form?: NgForm) {
    if (form != null) {
      form.form.reset();
    }

    this.formData = {
      id: 0,
      name: '',
      author: '',
      description: '',
      value: null,
      publishDate: null,
      categoryId: null
    };
  }

  private convertStringToDate(date) {
    return new Date(`${date.year}-${date.month}-${date.day}`);
  }
}
This is the CSS:
.form {
	margin: 0 auto !important;
	float: none !important;
}

.jumbtron {
	padding-top: 60px;
}
Routes
In the “app-routing.module.ts” we need to include the imports and add the routes in the variable “routes”:
import { HomeComponent } from './home/home.component';
import { BookListComponent } from './books/book-list/book-list.component';
import { BookComponent } from './books/book/book.component';
import { CategoryListComponent } from './categories/category-list/category-list.component';
import { CategoryComponent } from './categories/category/category.component';

const routes: Routes = [
    { path: 'home', component: HomeComponent },
    { path: 'books', component: BookListComponent },
    { path: 'book', component: BookComponent },
    { path: 'book/:id', component: BookComponent },
    { path: 'categories', component: CategoryListComponent },
    { path: 'category', component: CategoryComponent },
    { path: 'category/:id', component: CategoryComponent },
    { path: '**', redirectTo: 'home', pathMatch: 'full' }
];
This is how the file “app.module.ts” should be:
import { BrowserModule } from '@angular/platform-browser';
import { NgModule } from '@angular/core';

import { NgbModule } from '@ng-bootstrap/ng-bootstrap';
import { BrowserAnimationsModule } from '@angular/platform-browser/animations';
import { ToastrModule } from 'ngx-toastr';

import { AppRoutingModule } from './app-routing.module';
import { AppComponent } from './app.component';
import { HomeComponent } from './home/home.component';
import { NavComponent } from './nav/nav.component';
import { BookComponent } from './books/book/book.component';
import { BookListComponent } from './books/book-list/book-list.component';
import { CategoryComponent } from './categories/category/category.component';
import { CategoryListComponent } from './categories/category-list/category-list.component';
import { HttpClientModule } from '@angular/common/http';
import { FormsModule } from '@angular/forms';
import { BookService } from './_services/book.service';
import { CategoryService } from './_services/category.service';
import { ConfirmationDialogComponent } from './confirmation-dialog/confirmation-dialog.component';
import { ConfirmationDialogService } from './_services/confirmation-dialog.service';
import { NgbdDatepickerPopup } from './datepicker/datepicker-popup';

@NgModule({
  declarations: [
    AppComponent,
    HomeComponent,
    NavComponent,
    BookComponent,
    BookListComponent,
    CategoryComponent,
    CategoryListComponent,
    ConfirmationDialogComponent,
    NgbdDatepickerPopup
  ],
  imports: [
    BrowserModule,
    AppRoutingModule,
    FormsModule,
    HttpClientModule,
    NgbModule,
    BrowserAnimationsModule,
    ToastrModule.forRoot(),
  ],
  providers: [
    BookService,
    CategoryService,
    ConfirmationDialogService
  ],
  bootstrap: [AppComponent]
})
export class AppModule { }
Back-end
We need to add one configuration in the back-end to enable CORS, otherwise, we will not be able to connect the application.
Open the API project, and go to the “Startup.cs” file. In the “ConfigureServices” method we need to add this line:
services.AddCors();And in the “Configure” method we need to add this line:
app.UseCors(x => x.AllowAnyOrigin().AllowAnyMethod().AllowAnyHeader());The Application
Now let’s see how is the application, navigate to the root of the BookStore-SPA project and execute the command to run the application:
ng s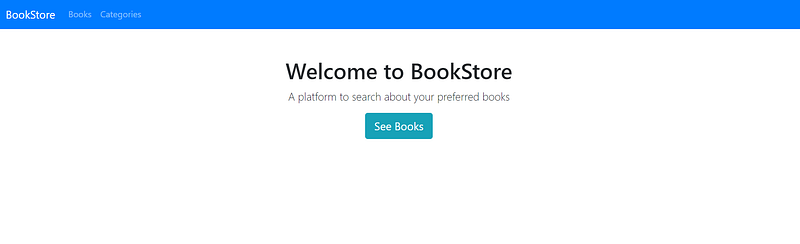
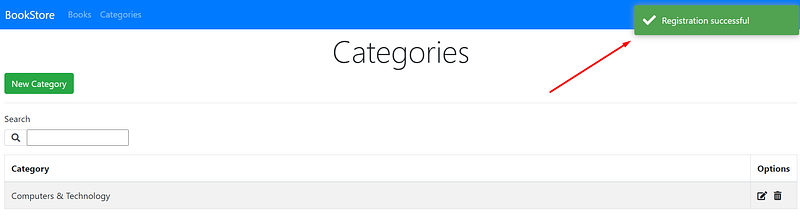
To add a new category we need to open the Category list page:
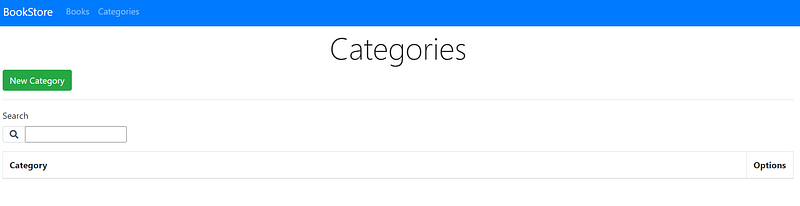
And click in the button “New Category”:
Now we added a new category and we can see in the list and after we save we will be redirected to the categories list page and the message saying that the registration was successful will be displayed::
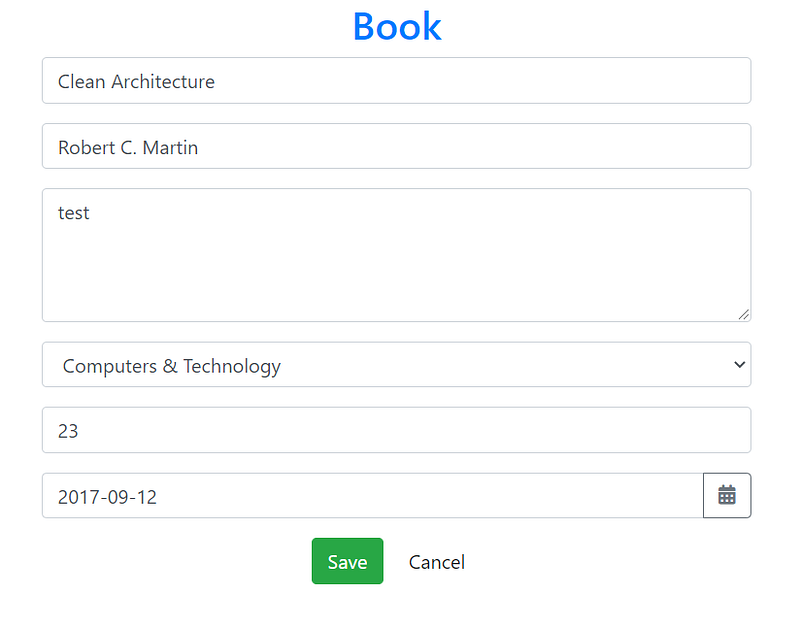
Now let’s add a new book
When we save we will be redirected to the book list page and the message saying that the registration was successful will be displayed:
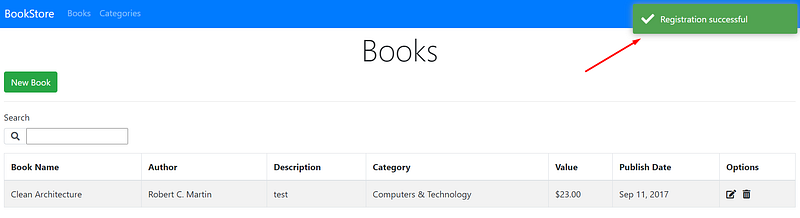
And we can see now the book in the list:
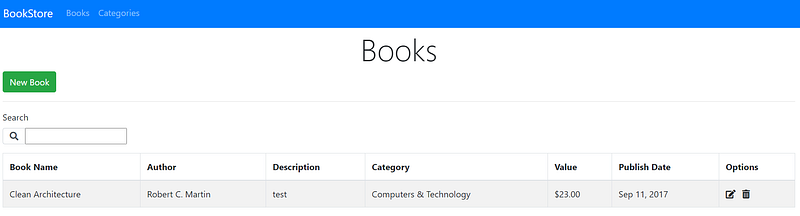
Let’s add more books and than we can also use the filter:
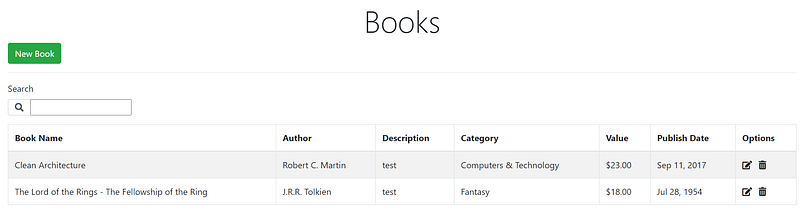
And we can search:

We can edit and delete the record:

To edit just click in the button and will be redirected to the book component:
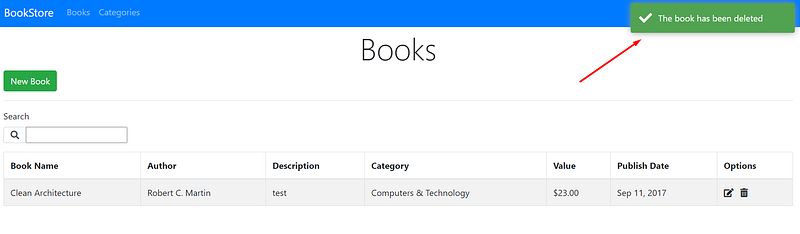
When we click on the delete button it will appear a confirmation dialogue:
If we click in “Ok”, it will appear the message saying that the book was deleted:
Conclusion
We have now a SPA project implemented, which allow us to execute the CRUD operation and the searching for the books and categories. We also worked with external components like the toastr that is used to display the messages, and we also implemented a DatePicker component using the NgBootstrap.
This is the link for the project in GitHub: https://github.com/henriquesd/BookStore
If you like this project, I kindly ask you to give a ⭐️ in the repository.
Thanks for reading!
References